Archive title

Autem vel eum iriure dolor in hendrerit in vulputate velit esse molestie consequat, vel illum dolore eu feugiat nulla facilisis at vero eros et dolore feugait.

Monthly Archive June 30, 2024

scroll saw blade size guide

A scroll saw’s precision relies on the right blade. This guide explores blade types, sizes, materials, and maintenance, helping hobbyists and craftsmen make informed choices for optimal results.

Importance of Choosing the Right Blade Size

Selecting the correct scroll saw blade size is crucial for achieving precise cuts and ensuring safety. The right blade size ensures optimal cutting efficiency, prevents blade breakage, and delivers a smooth finish. Using a blade that is too thick or too thin for the material can lead to poor cut quality, increased vibration, or even damage to the saw. Blade size directly impacts the tool’s performance, with thicker blades handling denser materials and thinner blades excelling at intricate details. Proper blade size selection also reduces the risk of accidents and extends blade lifespan. Always match the blade to the project’s requirements for the best results and a safer cutting experience.

Overview of Scroll Saw Blade Types

Scroll saw blades come in various types, each designed for specific cutting tasks. Pinned blades are sturdy, ideal for thick materials, while pinless blades offer flexibility and precision for intricate cuts. Straight tooth blades are great for clean, straight cuts but may require sanding. Skip tooth blades provide faster cutting and better chip clearance, reducing fuzz. Spiral blades allow for 360-degree cutting, perfect for complex curves. Reverse tooth blades help minimize splintering, especially on thin materials. Super-skip tooth blades combine speed with a smooth finish, ideal for hardwoods and acrylics. Understanding these types ensures you can match the blade to your project’s demands, enhancing both efficiency and results.

Types of Scroll Saw Blades

Scroll saw blades come in various types, each suited for specific materials and cutting needs. Choosing the right type ensures precise cuts and project success.

Pinned vs. Pinless Blades

Pinned blades are thicker with larger teeth, ideal for cutting thicker materials and straight lines quickly. Pinless blades are narrower, offering finer teeth for detailed cuts and intricate designs. Pinned blades are best for heavy-duty tasks, while pinless blades excel in precision work. Machines with clamp mechanisms can use either type, but some saws only accept pinned blades. Pinless blades often feature 360-degree cutting capabilities for complex curves. Starting with a multipack allows experimentation to find the best blade for your project. Always keep fingers away from the blade, as they are extremely sharp. Proper blade selection enhances safety and cutting efficiency, ensuring optimal results for any scroll saw project.

Straight Tooth Blades

Straight tooth blades are designed for clean, precise cuts and are ideal for following straight lines. They are known for their ability to leave a smooth finish with minimal burning. These blades are particularly effective for cutting thinner materials and are often preferred for projects requiring sharp, defined edges. However, they may leave some fuzz or splintering on the wood’s surface, depending on the material and blade sharpness. Straight tooth blades are available in various sizes, such as Polar (P), XL, Heavy Duty (HD), and Superior Puzzle (SP), making them versatile for different woodworking tasks. They are a great choice for beginners and experienced craftsmen alike, ensuring accurate and efficient cutting results.

Skip Tooth Blades

Skip tooth blades are a popular choice for their ability to provide smooth finishes and excellent chip clearance. They are designed with spaces between the teeth, allowing for faster cutting and reduced material buildup. These blades are ideal for cutting hard and medium-hardwoods, as well as materials like acrylics, when used at reduced speeds. Skip tooth blades are particularly effective for projects requiring quick, clean cuts without sacrificing precision. They are also suitable for cutting soft metals, such as copper, brass, and aluminum, making them versatile for various applications. Their aggressive cutting action and smooth finish make them a favorite among both hobbyists and professional craftsmen.

Spiral Blades

Spiral blades are a unique option for scroll sawing, featuring a continuous, coiled tooth design that allows for 360-degree cutting. This makes them ideal for intricate, curved cuts and detailed work. Spiral blades are particularly useful for cutting thin materials, such as plastic or metal, and are known for their ability to handle tight turns without breaking. However, they can be more challenging to control, especially for beginners. These blades are often used when the project requires precise, flexible cutting and are a favorite for creating complex shapes and patterns. Their versatility makes them a valuable addition to any scroll saw toolkit.

Scroll Saw Blade Sizes

Scroll saw blades are categorized by thickness and teeth per inch (TPI), with thicker blades suited for harder materials and finer blades for detailed, intricate cuts.

Understanding Blade Thickness

Blade thickness is a critical factor in scroll sawing, as it determines the blade’s rigidity and cutting capability. Thicker blades are ideal for cutting harder materials or thicker stock, while thinner blades are better suited for intricate details and tighter curves. The thickness of the blade also affects the kerf, or the width of the cut, which can impact the accuracy of your work; Choosing the right thickness ensures efficient cutting and minimizes the risk of blade breakage. Proper blade thickness selection balances material type, project complexity, and desired precision, making it a foundational element in achieving successful scroll saw results.

Teeth Per Inch (TPI) and Blade Size

Teeth Per Inch (TPI) is a key factor in determining blade size and cutting performance. Blades with higher TPI have more teeth, making them suitable for finer cuts and smoother finishes, ideal for thin materials. Lower TPI blades, with fewer teeth, are better for thicker materials and faster cuts but may leave a rougher edge. The right TPI ensures efficient cutting and prevents blade overload. Balancing TPI with blade thickness and material type is essential for optimal results, ensuring precise cuts and minimizing wear on the blade. Proper TPI selection enhances both the quality and speed of your scroll saw projects.

Standard Blade Size Ranges

Scroll saw blades are available in standard size ranges, typically numbered from 3/0 to 20. These sizes indicate the blade’s width and thickness, with smaller numbers representing narrower blades. Blades sized 3/0 to 5 are ideal for intricate cuts and thin materials, while larger sizes (10-20) are better for thicker stock and straighter cuts. The size range ensures versatility, allowing craftsmen to tackle various projects, from delicate woodwork to heavy-duty cutting. Proper blade size selection is crucial for achieving precise results and maintaining tool efficiency. Always match the blade size to your material thickness and project requirements for optimal performance.

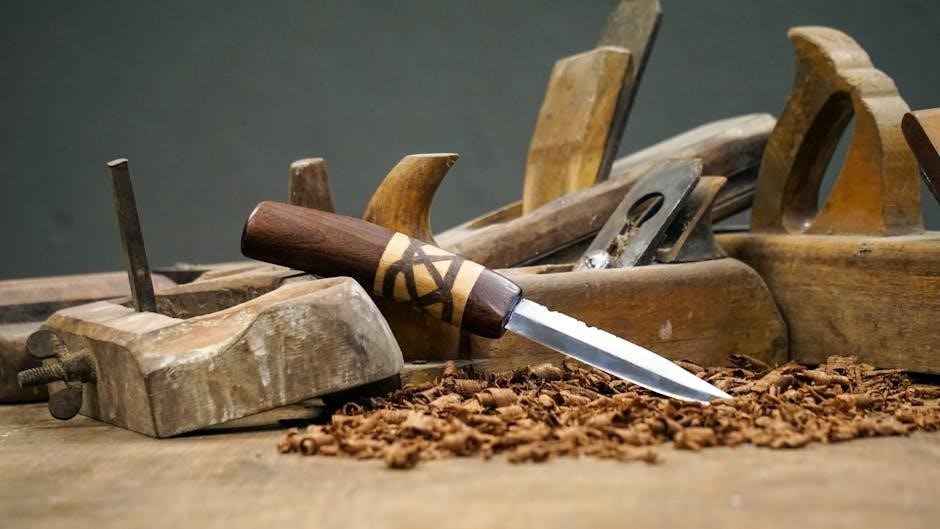
Blade Materials and Quality

Blades are made from high-carbon steel or bi-metal, offering durability and precision. High-quality blades ensure sharpness, longevity, and consistent performance, crucial for intricate and demanding scroll saw projects.

High-Carbon Steel Blades

High-carbon steel blades are a popular choice for scroll sawing due to their exceptional hardness and wear resistance. These blades are heat-treated to maintain sharpness and durability, making them ideal for cutting through various materials, including wood, plastic, and soft metals. They are known for their ability to handle both intricate details and thicker stock efficiently. However, they can be more brittle than bi-metal blades, requiring careful handling to prevent breakage. Despite this, their superior cutting performance and cost-effectiveness make them a favorite among both hobbyists and professional craftsmen for a wide range of projects.

Bi-Metal Blades

Bi-metal blades combine the best of both worlds, offering flexibility and durability. They feature a high-carbon steel edge for sharpness and a flexible backing to reduce breakage. This makes them ideal for intricate cuts and tight curves without compromising on longevity. Bi-metal blades are particularly suited for dense materials and complex patterns, where blade durability is crucial. They are more resistant to wear and tear compared to high-carbon steel blades, making them a great investment for frequent use. However, they can be more expensive, but their performance and longevity justify the cost for serious craftsmen and hobbyists seeking high-quality results.

Tooth Configuration and Its Impact

Tooth configuration significantly affects cutting efficiency and finish. Different arrangements, like straight or skip teeth, influence chip removal, smoothness, and material handling, optimizing performance for specific tasks.

Reverse Tooth Blades

Reverse tooth blades feature a unique configuration with a few teeth pointing backward at the blade’s bottom. This design helps reduce splintering, especially when cutting through materials like wood. By reversing some teeth, the blade pulls chips away more effectively, leaving a smoother finish on the underside of the workpiece. This makes reverse tooth blades ideal for intricate cuts and detailed work. They are particularly beneficial for woodworking projects where minimizing splintering is crucial. The reversed teeth also help in maintaining better control during complex cuts, ensuring cleaner results. This configuration is a popular choice among craftsmen for its ability to enhance precision and reduce post-cut sanding.

Super-Skip Tooth Blades

Super-skip tooth blades are designed for aggressive cutting while maintaining a smooth finish. They feature wider spaces between teeth compared to standard skip tooth blades, allowing for faster material removal and better chip clearance. This makes them ideal for cutting hard and medium-hardwoods, as well as materials like acrylics, especially when reduced speed is applied. The wider tooth spacing ensures minimal vibration and heat buildup, reducing the risk of blade breakage. These blades are perfect for projects requiring quick, precise cuts with a high-quality finish. Their unique configuration balances speed and accuracy, making them a favorite among experienced craftsmen for demanding tasks. Super-skip tooth blades are versatile and efficient, catering to both intricate designs and bulk material removal.

Selecting the Right Blade for Your Project

Choosing the right blade ensures precise cuts and optimal performance. Consider material type, thickness, and project complexity to select the ideal blade for your scroll saw tasks.

Material Thickness and Blade Choice

Material thickness is a critical factor in selecting the right scroll saw blade. Thicker materials require blades with fewer teeth per inch (TPI) and greater rigidity to ensure clean, straight cuts. Thinner materials, on the other hand, benefit from higher TPI blades, which provide smoother finishes and prevent splintering. For example, when working with hardwoods or metals, a blade with lower TPI is recommended, while softer woods or plastics may require finer blades. Matching blade specifications to material thickness ensures efficiency and prevents blade breakage, allowing for precise control and professional-quality results in various projects.

Complexity of the Cut and Blade Selection

The complexity of the cut directly influences blade selection. Intricate designs require finer blades with higher teeth per inch (TPI) for precision, while simpler cuts can use coarser blades for speed. For tight curves or detailed work, skip tooth or spiral blades are ideal due to their aggressive cutting action and smooth finishes. Straight tooth blades, however, are better for straight lines and faster material removal. Blade flexibility also plays a role; more rigid blades are preferred for thick materials, while flexible blades excel in intricate patterns. Matching blade characteristics to the project’s demands ensures accuracy, reduces breakage, and enhances overall cutting performance. Proper selection is key to achieving desired results.

Maintenance and Care of Scroll Saw Blades

Proper blade care involves cleaning after use, storing in dry places to prevent rust, and handling with care to avoid breakage. Regular maintenance ensures longevity and sharpness.

Proper Storage of Blades

Proper storage of scroll saw blades is essential to maintain their quality and longevity. Blades should be kept in a cool, dry place to prevent rust and corrosion. Using a protective case or pouch ensures they remain sharp and undamaged. Magnetic strips or blade organizers can help keep them tidy and prevent tangling. Store blades separately by type and size to avoid confusion and potential damage. Avoid stacking blades directly on top of each other, as this can cause bending or breakage. Regularly cleaning blades before storage also prevents residue buildup. Proper storage habits ensure your blades remain in optimal condition for future projects.

Cleaning and Maintaining Blades

Cleaning and maintaining scroll saw blades is crucial for optimal performance. Regularly remove debris and resin using a soft brush or mild solvent. Avoid harsh chemicals that may damage the blade’s coating. For metal blades, a light oil application can prevent rust. Store blades in a dry, cool environment to avoid corrosion. After each use, inspect for damage or dullness. Dull blades should be replaced promptly to ensure clean cuts and prevent breakage. Proper maintenance extends blade life and ensures consistent cutting quality. Regular care also enhances safety by reducing the risk of blade failure during operation. Keep blades clean and well-maintained for best results.

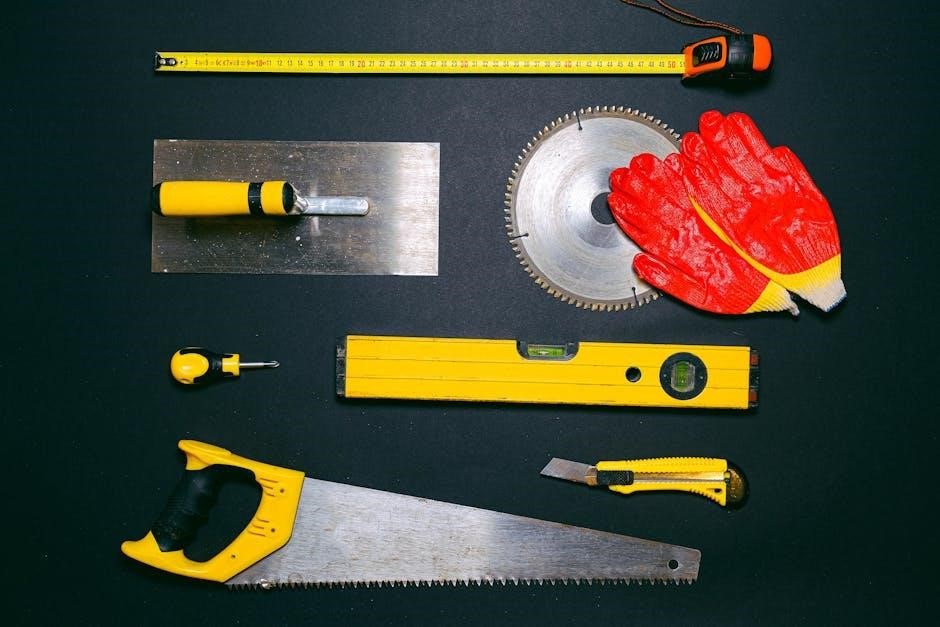
Safety Tips When Using Scroll Saw Blades

Always keep fingers and thumbs away from the blade. Feed material slowly, avoid sharp turns, and use relief cuts for complex shapes to prevent accidents and blade breakage.

Handling Blades Safely

Handling scroll saw blades requires caution due to their sharpness. Always wear protective gloves and use a tool or cloth to handle blades to avoid direct contact. Store blades in a dry, secure location, away from children. When installing or removing blades, ensure the saw is unplugged to prevent accidental start-ups. Keep your work area well-lit and clear of clutter to maintain focus. Avoid touching the blade’s teeth, as they can cause cuts. Proper handling prevents injuries and extends blade longevity. Always follow manufacturer guidelines for safe blade handling and maintenance to ensure a safe and efficient cutting experience.

Avoiding Common Accidents

Avoiding accidents with scroll saw blades starts with proper technique and awareness. Keep fingers and thumbs away from the blade at all times, as they are extremely sharp. Maintain control of the workpiece to prevent sudden movements that could cause blade breakage or loss of control. Avoid turning too sharply, as this can snap the blade. Use relief cuts to manage complex shapes safely. Always keep the workpiece large enough to handle comfortably, allowing for safe manipulation during cuts. Feed the blade slowly, especially when cutting through dense or hard materials. Stay focused and avoid distractions while operating the saw. Proper blade selection and maintenance also play a crucial role in preventing accidents. By following these guidelines, you can ensure a safer and more efficient cutting process.

Troubleshooting Common Blade Issues

Identify and resolve blade problems promptly to maintain cutting efficiency. Common issues include breakage, dullness, and improper fit. Regular maintenance and correct blade selection prevent these issues.

Blade Breakage and Prevention

Blade breakage is a common issue that can disrupt your scroll saw projects. It often occurs due to sharp turns, excessive material thickness, or using the wrong blade type. To prevent breakage, ensure your blade is suitable for the material’s thickness and the cut’s complexity. Avoid sudden, sharp turns that stress the blade. Regularly inspect blades for signs of wear or dullness, as dull blades are more prone to breaking. Proper storage and handling also play a crucial role in maintaining blade integrity. By selecting the right blade and operating with care, you can minimize breakage and achieve smoother cuts.

  • Avoid sharp turns that stress the blade.
  • Use blades appropriate for material thickness.
  • Inspect blades regularly for wear.
  • Store blades properly to prevent damage.

Improving Cut Quality

Improving cut quality with a scroll saw involves selecting the right blade for the material and ensuring proper technique. Using a blade with the correct teeth per inch (TPI) and thickness for the material ensures smoother cuts. Dull blades can cause splintering and uneven edges, so maintaining sharpness is essential. Proper blade tension and alignment also play a significant role in achieving precise cuts. Feeding the material slowly and steadily helps prevent vibrations that can degrade cut quality. Additionally, using blades with skip or reverse teeth can reduce splintering, especially on delicate materials. Regular blade maintenance and replacing worn blades will further enhance your results.

  • Choose the right blade for the material.
  • Maintain sharp blades to prevent splintering.
  • Ensure proper blade tension and alignment.
  • Feed material slowly and steadily.

mbp multi-surface bonding primer instructions

MBP Multi-Surface Bonding Primer is a versatile‚ high-performance primer designed for various surfaces‚ ensuring strong adhesion and durability. Ideal for multiple materials and projects‚ indoors and outdoors.

1.1 What is MBP Multi-Surface Bonding Primer?

MBP Multi-Surface Bonding Primer is a high-performance‚ water-based primer designed to create a strong bond between surfaces and finishes. It adheres to various materials‚ including metal‚ wood‚ plastic‚ and concrete‚ ensuring durability and versatility. This primer is formulated to enhance paint and coating performance‚ providing a smooth‚ even base for topcoats. Its unique properties make it ideal for both indoor and outdoor applications‚ offering excellent adhesion and resistance to peeling. Suitable for DIY projects and professional use‚ MBP primer is a reliable choice for achieving long-lasting results on diverse surfaces.

1.2 Importance of Using a Bonding Primer

Using a bonding primer is essential for ensuring a strong‚ durable bond between the surface and the final coating. It enhances adhesion‚ reducing the risk of peeling and flaking‚ and creates a uniform base for paint or finishes. This is especially crucial for surfaces like metal‚ wood‚ plastic‚ or concrete‚ which may have varying porosity or texture. A bonding primer also fills minor imperfections and seals porous areas‚ promoting a smooth‚ even finish. By improving surface preparation‚ it extends the lifespan of the paint job and ensures professional-grade results‚ making it a critical step in any painting or coating project.

1.3 Surfaces Suitable for MBP Primer

MBP Multi-Surface Bonding Primer is compatible with a wide range of surfaces‚ including wood‚ metal‚ plastic‚ concrete‚ drywall‚ and PVC. It is ideal for both indoor and outdoor applications‚ adhering effectively to porous and non-porous materials. The primer works well on surfaces like fiberglass‚ aluminum‚ and previously painted areas‚ making it versatile for various projects. Its unique formula ensures strong adhesion on challenging surfaces‚ such as glossy finishes or weathered materials. This versatility makes MBP Primer a reliable choice for diverse substrates‚ providing a solid foundation for paint or coatings to last longer and perform better.

Safety Precautions and Preparation

Ensure proper ventilation‚ wear protective gear like gloves and masks‚ and follow storage guidelines to maintain safety while using MBP Multi-Surface Bonding Primer effectively.

2.1 Personal Protective Equipment (PPE)

Wear appropriate PPE‚ including gloves‚ safety glasses‚ and a dust mask‚ to protect against skin contact and inhalation of fumes. Ensure proper ventilation to minimize exposure. Coveralls are recommended to prevent clothing contamination. PPE is essential for safety and compliance with health regulations when handling MBP Multi-Surface Bonding Primer.

2.2 Ventilation Requirements

Ensure excellent ventilation when using MBP Multi-Surface Bonding Primer to prevent inhaling fumes. Open windows and doors to allow fresh air circulation. Use fans to speed up airflow if necessary. Avoid working in confined or poorly ventilated spaces‚ as this can lead to health risks. Proper ventilation not only enhances safety but also helps the primer dry evenly and effectively. Always prioritize a well-ventilated environment for optimal results and safety.

2.3 Storage and Handling Tips

Store MBP Multi-Surface Bonding Primer in its original container with a tightly sealed lid. Keep it in a cool‚ dry place away from direct sunlight and heat sources. Avoid storing in areas prone to moisture or extreme temperatures. Handle the primer carefully to prevent spills and damage. Use in a well-ventilated area to minimize inhalation of fumes. Do not mix with other chemicals or products unless specified. Clean up spills immediately to prevent accidents. Dispose of leftover primer responsibly‚ following local regulations. Always follow the manufacturer’s instructions for safe handling and storage.

Materials and Tools Needed

Gather MBP primer‚ application tools like brushes or rollers‚ cleaning supplies‚ and optional sanding materials. Ensure all items are ready for efficient surface preparation and priming.

3.1 Primer and Application Tools

To apply MBP Multi-Surface Bonding Primer effectively‚ you’ll need the primer itself‚ a high-quality brush‚ roller‚ or sprayer. Choose tools based on the surface texture and size. For smooth surfaces‚ a roller or sprayer works best‚ while brushes are ideal for detailed areas or uneven textures. Ensure the tools are clean and free of debris to avoid contaminating the primer. Additionally‚ have a paint tray or container ready for roller application. The primer quantity depends on the surface area; follow the manufacturer’s coverage guidelines for accurate estimation.

3.2 Cleaning Supplies

Essential cleaning supplies include mild detergent‚ clean water‚ lint-free cloths or sponges‚ and scrub brushes for tough stains. Avoid harsh chemicals that might damage surfaces. For grease or oil‚ a solvent-based cleaner may be necessary. Ensure all supplies are readily available to thoroughly clean the surface before priming. Proper cleaning removes dirt‚ grime‚ and contaminants‚ ensuring better primer adhesion. Rinse surfaces well and allow them to dry completely before applying the primer. Clean tools regularly to maintain effectiveness and prevent cross-contamination.

3;4 Optional: Sanding and Repair Materials

For surfaces requiring extra preparation‚ consider sanding materials like medium-grit sandpaper (120-150 grit) and fine-grit sandpaper (220 grit) to smooth rough areas. Repair materials such as spackling compound‚ epoxy-based fillers‚ or acrylic caulk can address cracks‚ holes‚ or gaps. A putty knife is handy for applying fillers‚ while a wire brush can remove rust from metal surfaces. These tools help create a smooth‚ even base for priming‚ ensuring better adhesion and a professional finish. Use these materials sparingly and only where necessary to avoid unnecessary delays or waste.

Surface Preparation

Proper surface preparation is essential for optimal primer adhesion. Inspect‚ clean‚ and repair surfaces to ensure they are free of dirt‚ grease‚ and damage. This step ensures a strong bond and smooth finish.

4.1 Inspecting the Surface

Inspecting the surface is the first step in preparing for primer application. Look for cracks‚ flaking paint‚ dirt‚ grease‚ or old adhesives that could interfere with adhesion. Check for uneven areas‚ rust‚ or mold‚ depending on the material. Ensure the surface is stable and free from loose particles. Use a flashlight to spot imperfections and touch the surface to feel for rough spots. This step ensures a smooth‚ even base for the primer. Neglecting inspection can lead to poor adhesion and peeling‚ making it crucial for a successful outcome.

4.2 Cleaning the Surface

Cleaning the surface is essential for proper primer adhesion. Remove dirt‚ grease‚ oil‚ and contaminants using a mild detergent or degreaser. For tough grime‚ use a wire brush or scrubber. Rinse thoroughly with clean water and let dry. For metal surfaces‚ remove rust or corrosion with a wire brush or sandpaper. On concrete‚ pressure washing may be necessary. Avoid using harsh chemicals that could damage the material. Ensure the surface is free from dust and debris before priming. Proper cleaning ensures a strong bond between the primer and the surface‚ preventing peeling or adhesion issues.

4.3 Repairing Damaged Areas

Before applying MBP Multi-Surface Bonding Primer‚ repair any cracks‚ holes‚ or damaged areas to ensure a smooth‚ even surface. For small cracks‚ use a spackling compound or caulk‚ and let it dry completely. On wood surfaces‚ fill gaps with wood filler and sand smooth. For metal‚ remove rust and apply a metal filler if needed. On concrete‚ use a concrete patching compound to fill cracks. Sand repaired areas to create a seamless surface. Ensure repairs are fully dry and free of dust before priming. Proper repairs prevent uneven primer application and ensure long-lasting results.

4.4 Allowing the Surface to Dry

After cleaning and repairing‚ allow the surface to dry completely before applying MBP Multi-Surface Bonding Primer. Drying time varies depending on the material and environmental conditions. For surfaces treated with filler or caulk‚ wait according to the product’s instructions. Ensure no moisture remains‚ as it can hinder primer adhesion. Use fans or open windows to speed up drying if needed. Avoid applying primer on damp or wet surfaces. Once dry‚ inspect the surface to confirm it’s ready for priming. Proper drying ensures a strong bond between the primer and the surface‚ leading to a durable finish.

Application of MBP Multi-Surface Bonding Primer

Apply MBP Multi-Surface Bonding Primer evenly using a roller‚ brush‚ or spray gun. Work in sections‚ ensuring full coverage. Allow the primer to dry as instructed.

5.1 Taping and Masking

Taping and masking are essential for achieving clean‚ sharp edges and protecting areas not meant to be primed. Use high-quality painter’s tape and masking film to cover trim‚ windows‚ and floors. Apply the tape firmly to ensure a seal‚ and press edges to prevent seepage. For intricate areas‚ use pre-shaped masking materials. Always remove tape carefully after priming but before the primer fully dries to avoid pulling off the primer. Proper masking ensures professional-looking results and saves time on cleanup.

5.2 Stirring the Primer

Stirring the MBP Multi-Surface Bonding Primer is crucial for even consistency and proper application. Use a sturdy stirrer or mixing stick to thoroughly mix the primer in a circular motion. Start from the bottom and work upwards to ensure all settled particles are incorporated. Continue stirring until the primer reaches a smooth‚ uniform texture. Avoid vigorous stirring‚ as it may introduce air bubbles. If the primer has been stored for a long time‚ allow it to sit for a few minutes before stirring to prevent lumps. Proper mixing ensures optimal adhesion and performance.

5.3 Applying the Primer

Apply the MBP Multi-Surface Bonding Primer using a high-quality brush‚ roller‚ or sprayer‚ depending on the surface size and texture. Work in thin‚ even layers to avoid drips or uneven coverage. Start at one end of the surface and move systematically to the other‚ ensuring complete coverage. Use light‚ overlapping strokes with a brush or smooth‚ consistent rolls with a roller. For sprayers‚ maintain a steady distance and motion to achieve uniformity. Apply primer within the recommended thickness to prevent peeling or cracking. Allow the primer to dry completely before applying a second coat or proceeding with your topcoat.

5.4 Allowing the Primer to Dry

After applying the primer‚ allow it to dry completely according to the manufacturer’s instructions. Drying time typically ranges from 30 minutes to 2 hours‚ depending on temperature and humidity. Ensure the surface remains undisturbed during this period to prevent dust or debris from settling. Avoid exposure to direct sunlight or moisture until fully dry. If the primer dries too quickly‚ it may lead to uneven adhesion. Once dry‚ the surface should feel tack-free and ready for painting or further treatment. Proper drying is essential for optimal bonding and long-lasting results.

Curing and Drying Times

MBP Multi-Surface Bonding Primer typically dries to the touch within 30 minutes to 1 hour and fully cures in 24 hours‚ depending on environmental conditions and thickness applied.

6.1 Initial Drying Time

The MBP Multi-Surface Bonding Primer typically begins to dry within 30 minutes to 1 hour after application‚ depending on environmental conditions. It is essential to allow the primer to dry completely before proceeding with additional coats or finishing layers. During this initial phase‚ the primer forms a strong bond with the surface‚ ensuring optimal adhesion for subsequent paints or coatings. Avoid touching or applying pressure to the surface during this time‚ as it may disrupt the bonding process. Always refer to the product’s instructions for specific drying times tailored to your project’s conditions.

6.2 Full Cure Time

The MBP Multi-Surface Bonding Primer reaches its full cure time within 24 hours under normal conditions. This allows the primer to achieve maximum hardness and bonding strength. Factors such as temperature‚ humidity‚ and ventilation can influence the curing process. For optimal results‚ ensure the surface is not exposed to moisture or heavy use during this period. Allowing the primer to cure fully ensures a durable and long-lasting bond between the primer and subsequent coatings. Always wait the recommended time before applying paint or other finishes to achieve the best results.

6.3 Factors Affecting Drying Time

Several factors can influence the drying time of MBP Multi-Surface Bonding Primer. Temperature and humidity are key; higher temperatures and lower humidity typically speed up the process‚ while cooler conditions slow it down. Ventilation is crucial‚ as poor airflow can delay drying. The thickness of the primer application also plays a role‚ with thicker coats taking longer to dry. Additionally‚ the type of surface being primed and ambient conditions‚ such as air circulation in the room‚ can impact drying time. Always consider these factors to ensure optimal drying and curing of the primer.

Post-Application Instructions

After applying MBP Multi-Surface Bonding Primer‚ inspect the surface for even coverage. Allow the primer to dry completely before proceeding with painting or further applications. Ensure proper ventilation.

7.1 Inspecting the Primer Coat

After applying the MBP Multi-Surface Bonding Primer‚ inspect the surface to ensure even coverage. Check for any thin spots‚ streaks‚ or areas where the primer may have been missed. Look for imperfections like bubbles or unevenness. Use a flashlight to highlight any inconsistencies. If necessary‚ address issues by reapplying primer or sanding lightly. Ensure the surface is smooth and properly prepared for the next step. This inspection step is crucial for achieving a strong bond and a professional finish. Be patient and thorough to avoid complications later in the process.

7.2 Sanding the Primer

Sanding the primer is essential for achieving a smooth surface. Use fine-grit sandpaper (120-150 grit) to lightly sand the primed area‚ feathering edges to blend seamlessly. Work in small sections‚ sanding in one direction to maintain evenness. Avoid applying too much pressure‚ which could remove excess primer. After sanding‚ wipe away dust with a tack cloth or damp cloth to ensure a clean surface for the next coat. Sanding enhances adhesion and creates a professional finish. For best results‚ sand lightly and avoid skipping this step‚ as it ensures proper bonding and a smooth final result.

7.3 Cleaning Up

Cleaning up after applying MBP Multi-Surface Bonding Primer is crucial for maintaining tools and workspace. Immediately wash brushes‚ rollers‚ and spray equipment with soap and warm water. For dried primer‚ use mineral spirits or paint thinner. Dispose of leftover primer and materials responsibly‚ following local regulations. Wipe spills and splatters promptly to prevent sticking. Clean hands thoroughly with soap and water or a solvent-based hand cleaner. Regular cleaning prevents waste and extends tool life‚ ensuring future projects remain efficient and professional; Always wear gloves during cleanup to protect skin from residue.

Troubleshooting Common Issues

Troubleshooting common issues with MBP primer involves addressing peeling‚ flaking‚ or uneven coverage. Check surface preparation‚ application thickness‚ and environmental conditions. Adjust as needed for optimal results.

8.1 Peeling or Flaking

Peeling or flaking of MBP primer can occur due to poor surface preparation or insufficient adhesion. Ensure the surface is clean‚ dry‚ and free of grease or old paint. If peeling occurs‚ lightly sand the affected area‚ reapply primer‚ and allow it to dry completely. Avoid applying thick layers‚ as this can lead to peeling. Proper surface inspection and cleaning before application are crucial to prevent this issue. Environmental factors‚ such as high humidity or extreme temperatures‚ may also contribute to peeling. Always follow the manufacturer’s instructions for optimal results.

8.2 Uneven Coverage

Uneven coverage with MBP Multi-Surface Bonding Primer can result from improper application techniques or insufficient primer quantity. To address this‚ ensure the primer is evenly spread using a high-quality brush‚ roller‚ or spray gun. Apply thin‚ consistent coats‚ allowing the first layer to dry before recoating. Check for areas with inadequate coverage by inspecting under good lighting. If necessary‚ lightly sand uneven areas and reapply primer. Avoid rushing the process‚ as this can lead to uneven distribution. Proper stirring of the primer before use is also essential to maintain uniform viscosity and adhesion properties.

8.3 Bubbles or Blistering

Bubbles or blistering in MBP Multi-Surface Bonding Primer can occur due to trapped air‚ moisture‚ or uneven surface preparation. To fix this‚ allow the primer to dry completely‚ then lightly sand the affected areas using fine-grit sandpaper. Wipe away dust with a clean‚ damp cloth. Reapply a thin‚ even coat of primer‚ ensuring proper ventilation to prevent moisture buildup. Avoid applying thick layers‚ as this can trap air and cause blisters. If blisters persist‚ check the surface for underlying issues‚ such as poor adhesion or contamination‚ and address them before reapplying the primer.

Tips for Best Results

Ensure surfaces are clean‚ dry‚ and properly prepared; Apply primer in thin‚ even coats‚ allowing adequate drying time between layers. Work in well-ventilated areas for optimal results.

9.1 Priming in Ideal Conditions

For optimal results‚ apply MBP Multi-Surface Bonding Primer in a well-ventilated area with temperatures between 60°F and 80°F (15°C to 27°C). Avoid extreme humidity or direct sunlight‚ as these can affect drying and adhesion. Ensure the surface is dry and free of moisture‚ as dampness can hinder primer performance. Ideal conditions promote proper bonding‚ even coverage‚ and faster drying. Always follow the manufacturer’s recommendations for environmental conditions to achieve the best outcome for your project.

9.2 Avoiding Rushing the Process

Avoid rushing the priming process to ensure proper adhesion and coverage. Allow each coat to dry completely as per instructions‚ typically 30 minutes to an hour‚ depending on conditions. Rushing can lead to uneven layers‚ peeling‚ or poor bonding. Always follow the recommended drying times and apply thin‚ even coats. Patience ensures a strong foundation for your final finish. Check the product instructions for specific drying times and work in small sections to maintain control. Proper timing is key to achieving professional-quality results with MBP Multi-Surface Bonding Primer.

9.3 Using the Right Tools

Using the right tools ensures a smooth‚ even application of MBP Multi-Surface Bonding Primer. For most surfaces‚ a high-quality roller or brush is ideal. Natural-bristle brushes work best for oil-based primers‚ while synthetic brushes are suitable for water-based formulas. For large areas‚ consider using a sprayer for efficient coverage. Always choose tools designed for your specific primer type to avoid streaks or unevenness. Proper tools help achieve professional results‚ ensuring strong adhesion and a durable finish. Clean and maintain tools regularly to extend their lifespan and performance. The right tools make the application process easier and more effective.

Safety Precautions During and After Use

Always wear PPE‚ ensure good ventilation‚ and avoid skin contact. Dispose of leftover primer responsibly and clean tools thoroughly. Store unused primer in a cool‚ dry place.

10.1 Disposal of Leftover Primer

Dispose of leftover MBP Multi-Surface Bonding Primer responsibly. Check local regulations for hazardous waste disposal. Do not pour primer down drains or mix with other waste. Seal the container tightly and take it to a designated hazardous waste collection facility. Empty primer containers should be dried thoroughly before recycling. Avoid littering or improper disposal to protect the environment and comply with safety standards. Always follow local guidelines for proper disposal procedures.

10.2 Cleaning Tools

Clean tools immediately after use with a solvent recommended for MBP Multi-Surface Bonding Primer‚ such as mineral spirits or paint thinner. Dip the tool in the solvent and work from the ferrule to the bristle tips. Use a lint-free cloth to wipe away primer residue. Repeat until the tool is clean. Avoid using water‚ as it may not effectively remove the primer. For rollers or brushes‚ clean thoroughly to prevent primer from hardening. Regular cleaning extends tool life and ensures optimal performance for future use. Always follow safety precautions when handling solvents.

10.3 Storing Unused Primer

Store MBP Multi-Surface Bonding Primer in its original‚ tightly sealed container to maintain quality. Keep it in a cool‚ dry place away from direct sunlight and heat sources. Ensure the storage area is well-ventilated and protected from moisture. Avoid extreme temperatures‚ as they can alter the primer’s consistency. Do not store in vehicles or areas prone to temperature fluctuations. Keep out of reach of children and pets. Check the expiration date before future use and ensure the primer is still viable. Proper storage extends shelf life and ensures optimal performance when needed.

MBP Multi-Surface Bonding Primer is a reliable solution for ensuring strong adhesion and durability across various surfaces. Follow instructions carefully for optimal results and long-lasting performance;

11.1 Summary of Key Steps

Using MBP Multi-Surface Bonding Primer involves preparing the surface‚ applying the primer evenly‚ and allowing it to dry completely. Ensure proper ventilation‚ wear PPE‚ and follow safety guidelines. Clean and repair surfaces before application‚ and avoid rushing the drying process. Lightly sand the primer for smoother finishes and inspect for even coverage. Proper preparation and adherence to instructions ensure a strong bond and long-lasting results. Always store leftover primer safely and dispose of materials responsibly. By following these steps‚ you achieve professional-grade outcomes for your projects.

11.2 Final Tips for Success

For optimal results with MBP Multi-Surface Bonding Primer‚ always work in well-ventilated‚ temperature-controlled environments. Avoid shortcuts‚ as proper preparation and drying times are crucial. Use high-quality tools and ensure surfaces are clean and dry before application. Regularly inspect your work for even coverage and address any imperfections promptly. Store leftover primer in a cool‚ dry place‚ and dispose of unused product responsibly. Patience and attention to detail will yield a professional finish. Follow all safety guidelines and manufacturer instructions to achieve long-lasting‚ durable results for your projects.

food 4 less application pdf

Food 4 Less, part of the Kroger family, is a popular supermarket chain offering affordable groceries and fresh produce. It provides various job opportunities, with the application process simplified through a printable PDF form, ensuring convenience and standardization for applicants.

1.1 Overview of Food 4 Less and Its Services

Food 4 Less is a renowned supermarket chain operating under the Kroger family, offering a wide range of fresh produce, groceries, and household essentials at affordable prices. Known for its commitment to quality and customer satisfaction, the chain provides a convenient shopping experience with a vast selection of products tailored to diverse consumer needs. Food 4 Less stores are designed to offer a hassle-free environment, ensuring shoppers can easily find what they need. The chain’s focus on affordability and accessibility makes it a popular choice for many families and individuals seeking budget-friendly options without compromising on quality.

1.2 Food 4 Less as Part of the Kroger Family

Food 4 Less operates as a subsidiary of The Kroger Co., one of the largest grocery retailers in the United States. This affiliation enables Food 4 Less to leverage Kroger’s extensive resources, ensuring a wide selection of products and competitive pricing. As part of the Kroger family, Food 4 Less benefits from shared operational strategies and a commitment to customer satisfaction. This partnership also enhances the chain’s ability to offer fresh produce, groceries, and household essentials at affordable prices. The Kroger connection further supports Food 4 Less in maintaining high standards of service and providing employment opportunities across its locations, making it a trusted choice for both shoppers and job seekers.

Understanding the Food 4 Less Job Application Process

The Food 4 Less job application process is streamlined with a printable PDF form, allowing applicants to complete it offline, review their responses, and submit professionally.

2.1 Importance of the Food 4 Less Job Application PDF

The Food 4 Less job application PDF is a standardized form that ensures consistency and professionalism in the application process. It allows applicants to fill out the form offline, reducing errors and enabling careful review before submission. The PDF format preserves the layout across devices, making it easy to print and submit in person. This standardized approach helps Food 4 Less maintain uniformity in collecting applicant information, streamlining the hiring process. By using the PDF, applicants can ensure their submissions are complete and professional, increasing their chances of making a positive impression. It also avoids the risks of formatting issues that can occur with other document types.

2.2 Benefits of Using a Printable Job Application

Using a printable Food 4 Less job application offers several advantages. It allows applicants to complete the form offline, reducing the risk of technical issues and enabling a more thoughtful, error-free submission. The PDF format ensures consistency, maintaining the same appearance across all devices. Applicants can review and edit their responses before printing, ensuring professionalism. Additionally, printable applications are environmentally friendly, as they can be reused or saved digitally. This method also provides a tangible copy for personal records, making it easier to track and follow up on submissions. Overall, printable applications streamline the process, offering convenience and clarity for both applicants and employers.

2.3 How to Access the Food 4 Less Job Application Form

To access the Food 4 Less job application form, visit the official Kroger or Food 4 Less website and navigate to the careers section. The application is typically available as a downloadable PDF. Alternatively, you can search for “Food 4 Less job application PDF” on popular search engines or visit trusted online platforms that host employment forms. Some websites offer direct links to download the form, while others may require creating an account. Once downloaded, the PDF can be printed or filled out digitally using tools like PDF editors. Ensure you download the most recent version to avoid outdated information. If unable to find the form online, visit your local Food 4 Less store for assistance.

Steps to Complete the Food 4 Less Application

Download the Food 4 Less job application PDF, fill it out offline to avoid errors, review each section, edit as needed, and ensure all information is accurate before submission;

3.1 Downloading the Food 4 Less Job Application PDF

Downloading the Food 4 Less job application PDF is a straightforward process. Visit the official Food 4 Less website or trusted third-party sources like Google Forms or PDF repositories. Click on the download link provided, and save the file to your device. Ensure you have a PDF reader installed to open and view the document. The PDF format ensures consistency and professionalism, making it easy to fill out offline. Once downloaded, you can print it or edit it using tools like pdfFiller. This step is essential for starting your application journey, as it provides a standardized form for submitting your information.

3.2 Filling Out the Application Form Offline

Filling out the Food 4 Less job application form offline is a convenient option for applicants. Once downloaded, the PDF can be opened using a PDF reader or editing tools like pdfFiller. Applicants can type or write their information directly onto the form, ensuring accuracy and clarity. Offline completion allows for careful review and editing before submission, reducing the risk of errors. This method is ideal for those who prefer to work at their own pace or have limited internet access. After completing the form, applicants can print it or save it digitally for submission via email, fax, or in-person. This step ensures a professional and polished application.

3.3 Reviewing and Editing the Application

Reviewing and editing the Food 4 Less job application is crucial for ensuring accuracy and professionalism. After filling out the form offline, applicants should carefully check for any errors or omissions. Using tools like pdfFiller or other PDF editors, individuals can make necessary adjustments, such as correcting typos or clarifying responses. It’s important to verify that all personal details, employment history, and references are accurate and up-to-date. A polished application reflects attention to detail and increases the likelihood of a positive impression; Once satisfied, the form can be saved or printed for submission. This step ensures the application is error-free and professionally presented.

Required Information for the Application

The Food 4 Less application requires personal details, employment history, and references. Ensure all information is accurate and up-to-date for a smooth application process.

4.1 Personal Details and Contact Information

The Food 4 Less application requires applicants to provide accurate personal details, including their full name, address, phone number, and email. This information is essential for communication and record-keeping purposes. Applicants must ensure that all contact details are up-to-date and correctly formatted to avoid any issues during the hiring process. Additionally, providing a valid phone number and email address is crucial, as these are the primary methods used by the hiring team to reach out for interviews or follow-ups. Accurate personal details also help in verifying the applicant’s identity and eligibility for employment. Ensuring this information is correct is the first step toward a successful application.

4.2 Employment History and Previous Work Experience

The Food 4 Less application requires a detailed account of your employment history, including job titles, company names, locations, and dates of employment. Applicants must provide accurate information about their previous work experience, ensuring consistency and relevance to the position they are applying for. This section helps the hiring team assess your skills, work ethic, and suitability for the role. It is important to include job descriptions and achievements that highlight your qualifications. For positions requiring specific skills, such as cashier or management roles, emphasizing relevant experience is crucial. Incomplete or inaccurate employment history may delay the application process or lead to disqualification.

4.3 References and Additional Information

The Food 4 Less application requires applicants to provide professional references, typically two to three, who can vouch for their skills and work ethic. Include names, job titles, company names, and contact information for each reference. Ensure references are relevant to the position and can speak to your qualifications. Applicants should inform their references in advance to avoid delays. Additionally, this section may allow for including any special skills, certifications, or other relevant information that strengthens your application. Providing accurate and complete reference details is essential for a smooth hiring process. This section helps Food 4 Less assess your credibility and suitability for the role.

Submission Methods for the Application

Applications can be submitted in-person at a Food 4 Less store, via email, fax, or through the Kroger online portal for convenience and efficiency.

5.1 Submitting the Application In-Person

Submitting the Food 4 Less job application in-person is a straightforward and effective method. Applicants can visit their nearest store and hand-deliver the completed PDF form to the hiring manager or customer service desk. This approach ensures the application is received immediately and allows for potential face-to-face interaction, which can leave a positive impression. It also provides an opportunity to ask questions or express enthusiasm for the role. Ensure the form is fully filled out and neatly presented to maintain professionalism. In-person submission is ideal for those who prefer direct communication and want to confirm their application has been received without delays.

5.2 Email and Fax Submission Options

Email and fax submissions offer convenient alternatives to in-person applications for Food 4 Less jobs. Applicants can send their completed PDF application to the store’s designated email address or fax number, which can be found on the official website or by contacting the store directly. This method is ideal for those who prefer digital submission or cannot visit the store in person. Ensure the application is clearly scanned or converted to PDF format before sending. While email and fax are efficient, they may lack the immediate confirmation of in-person submission. Applicants should double-check their contact information to ensure timely follow-up and receipt confirmation.

5.3 Online Submission Through the Kroger Portal

Applicants can conveniently submit their Food 4 Less job application through the Kroger portal, a user-friendly online platform. This method allows candidates to upload their completed PDF application directly to the system. To use this option, applicants must create or log into their Kroger account, navigate to the careers section, and select the desired position. The portal guides users through the submission process, ensuring all required fields are filled. Online submission offers real-time confirmation and reduces the need for physical visits. However, applicants should ensure their PDF is properly formatted and complete before uploading. This method is efficient and environmentally friendly, aligning with modern hiring practices.

Tips for a Successful Application

Ensure accuracy and completeness in your application. Highlight relevant skills and qualifications. Proofread thoroughly to avoid errors. Follow up after submission to express interest and confirm receipt.

6.1 Ensuring Accuracy and Completeness

Accuracy and completeness are crucial when filling out the Food 4 Less job application PDF. Even minor errors can lead to rejection, so review the form thoroughly. Ensure all personal details, employment history, and references are correct and up-to-date. Use the printable PDF to fill out the form offline, allowing time to review and edit before submission. Incomplete sections or inaccuracies can delay processing or result in missed opportunities. Double-check spelling, dates, and contact information to maintain professionalism. A well-prepared application demonstrates attention to detail and seriousness about the position, increasing the chances of a positive response from the hiring team.

6.2 Highlighting Relevant Skills and Qualifications

When completing the Food 4 Less job application PDF, it’s essential to highlight relevant skills and qualifications that align with the position. Tailor your application to the specific role by emphasizing experiences and abilities that match the job requirements. For example, if applying for a customer-facing position, highlight excellent communication and interpersonal skills. Quantify achievements, such as “managed a team of 5” or “increased sales by 10%.” Include certifications, training, or previous roles that demonstrate your suitability. Being specific and relevant shows hiring managers you’re a strong candidate. This approach helps you stand out and increases your chances of securing an interview.

6.3 Following Up After Submission

Following up after submitting your Food 4 Less job application PDF is a crucial step to demonstrate your enthusiasm and responsibility. After submitting your application, wait a reasonable time, such as one to two weeks, before reaching out. Contact the store directly via phone or email to inquire about the status of your application. Be polite and professional, reiterating your interest in the position. This proactive approach shows initiative and helps keep you on the hiring manager’s radar. Additionally, following up allows you to address any potential issues or provide additional information if needed. It’s a simple yet effective way to stay engaged in the hiring process.

The Interview Process at Food 4 Less

The interview process at Food 4 Less typically involves behavioral and role-specific questions to assess your skills and fit for the position. Preparation is key.

7.1 What to Expect During the Interview

During the interview at Food 4 Less, candidates can expect a mix of behavioral and role-specific questions to assess their skills and fit for the position. The process may include a panel interview or a one-on-one meeting, depending on the role. Questions often focus on teamwork, customer service, and problem-solving abilities. Applicants should be prepared to discuss their previous work experience, highlighting relevant skills and how they align with Food 4 Less’s values. The interview is also an opportunity for candidates to ask questions about the role and work environment. Professional attire and bringing multiple copies of the application are recommended for a polished impression.

7.2 Preparing for Common Interview Questions

Preparing for common interview questions is crucial to make a strong impression at Food 4 Less. Candidates should anticipate questions about teamwork, customer service, and problem-solving. Practicing responses to scenarios like handling difficult customers or working under pressure is beneficial. Reviewing the company’s values, such as affordability and community focus, can help align answers with Food 4 Less’s mission. Applicants should also prepare to discuss their availability, flexibility, and willingness to learn. Using the STAR method (Situation, Task, Action, Result) to structure responses can enhance clarity. Researching the company and practicing with mock interviews can boost confidence and readiness for the actual interview.

The Role of the Food 4 Less Application PDF

The Food 4 Less application PDF standardizes the hiring process, ensuring consistency and professionalism. It collects essential applicant information, streamlining the evaluation of qualifications for various roles.

8.1 Standardization and Consistency in Applications

The Food 4 Less application PDF ensures standardization, providing a consistent format for all applicants. This uniformity allows hiring managers to evaluate candidates fairly, as everyone submits the same information. The PDF format preserves the layout across devices, preventing formatting issues that might arise with other file types. By standardizing the application process, Food 4 Less maintains professionalism and efficiency in handling a high volume of applications. This consistency also helps applicants present their qualifications clearly, ensuring that no important details are overlooked. The structured format of the PDF makes it easier for both applicants and employers to navigate the hiring process seamlessly.

8.2 Ensuring Professionalism in the Application Process

The Food 4 Less application PDF plays a crucial role in maintaining professionalism throughout the hiring process. By providing a standardized format, it ensures that all applications are presented consistently, allowing hiring managers to evaluate candidates fairly. The PDF’s professional layout and readability across devices enhance the applicant’s credibility. Applicants can review and edit their responses offline, reducing errors and ensuring a polished submission. This level of professionalism not only reflects well on the applicant but also aligns with Food 4 Less’s commitment to a structured and respectful hiring process. A well-formatted PDF application fosters a positive first impression, essential for making a strong impact on potential employers.

Common Mistakes to Avoid

Common mistakes in the Food 4 Less application process include incomplete or inaccurate information, lack of proofreading, and submitting applications without proper formatting. These errors can hinder chances of selection.

9.1 Incomplete or Inaccurate Information

One of the most common mistakes applicants make is submitting incomplete or inaccurate information on the Food 4 Less job application PDF. This can include missing contact details, incorrect employment history, or typos in personal information. Such errors can lead to delays or even rejection, as hiring managers rely on the accuracy of the provided data. To avoid this, applicants should carefully review each section of the form before submission. Double-checking phone numbers, email addresses, and previous work experience is essential. Additionally, ensuring all fields are filled out completely prevents misunderstandings. Accuracy is crucial for making a positive impression and increasing the chances of selection.

9.2 Lack of Proofreading and Editing

Failing to proofread and edit the Food 4 Less job application PDF is a critical mistake that can harm an applicant’s chances. Typos, grammatical errors, and formatting issues can create a negative impression, suggesting a lack of attention to detail. Hiring managers often view such oversights as unprofessional and may question the applicant’s seriousness about the role. To avoid this, applicants should review their application multiple times, checking for spelling and grammar mistakes. Using tools like spell check or asking a friend to review the form can help catch errors. A polished application reflects professionalism and increases the likelihood of a positive response from employers.

The Importance of a Well-Formatted Application

A well-formatted application ensures clarity and professionalism, making it easier for hiring managers to review. It reflects attention to detail and enhances the applicant’s credibility.

10.1 PDF vs. Word Formats for Applications

When applying for jobs at Food 4 Less, choosing the right file format is crucial. PDFs are preferred due to their consistency across devices, ensuring the application appears professional and well-formatted. Unlike Word documents, which may lose formatting when opened on different systems, PDFs maintain their structure. This makes them ideal for showcasing a polished application. Additionally, PDFs are widely accepted and easy to print, which is beneficial for in-person submissions. While Word files offer more flexibility for editing, PDFs are better suited for final submissions, as they preserve the intended layout and prevent accidental modifications. Thus, using a PDF ensures a professional presentation of your application.

10.2 The Advantage of Cloud-Based Forms

Cloud-based forms offer significant advantages for applicants, providing easy access and convenience. These forms can be accessed from any device with an internet connection, allowing applicants to fill them out at their convenience. Cloud-based platforms also enable real-time collaboration and automatic saving, reducing the risk of data loss. Tools like Google Forms and pdfFiller allow applicants to edit, sign, and submit forms digitally, streamlining the process. This method is particularly useful for Food 4 Less applications, as it ensures a seamless and efficient experience. Cloud-based forms also facilitate faster submission and processing, making the overall application process more efficient and user-friendly.

Additional Resources for Applicants

Applicants can access free templates, contracts, and tools online for editing and signing PDFs, such as pdfFiller and Google Forms, streamlining the application process efficiently.

11.1 Free Templates and Contracts Online

Applicants can access a wide range of free templates and contracts online, specifically designed for job applications. Websites like pdfFiller and Google Forms offer customizable PDF templates that simplify the application process. These resources provide pre-designed formats, ensuring consistency and professionalism. Additionally, platforms like PrintFriendly allow users to download, print, and sign forms effortlessly. With these tools, applicants can avoid starting from scratch, saving time and reducing errors. The availability of these templates ensures that candidates can present their information clearly and effectively, making the application process more efficient and stress-free. Utilizing these resources is a smart way to enhance the quality of your submission.

11.2 Tools for Editing and Signing PDFs

Several tools are available to help applicants edit and sign their Food 4 Less job application PDFs. Platforms like pdfFiller and Adobe Acrobat offer robust editing features, allowing users to fill out forms, add text, and insert signatures; These tools are user-friendly and accessible from various devices, including PCs, tablets, and smartphones. Additionally, cloud-based solutions like Google Forms and DocuSign enable seamless electronic signing and sharing of documents. These resources streamline the application process, ensuring that candidates can complete and submit their forms professionally and efficiently. By utilizing these tools, applicants can avoid manual paperwork and ensure their applications are neat, accurate, and ready for submission.

Using the Food 4 Less job application PDF ensures a professional and efficient application process, with tools like pdfFiller and DocuSign making it easy to edit and sign.

12.1 Final Thoughts on the Food 4 Less Application Process

The Food 4 Less application process is designed to be straightforward and accessible, with the PDF format ensuring consistency and professionalism. By using tools like pdfFiller, applicants can easily edit and sign their forms, streamlining the submission process. The ability to fill out the application offline allows for careful review, reducing errors and ensuring accuracy. This method also provides a professional presentation of qualifications, which is crucial for making a strong impression. Overall, the Food 4 Less job application PDF offers a convenient and organized way to apply, making it a valuable resource for those seeking employment opportunities within the Kroger family of stores.

are study guides 5.0

ARE 5․0 study guides are essential tools for architects preparing for the exam, offering comprehensive coverage of all six divisions and practical resources to ensure success․

Overview of the ARE 5․0 Exam

The ARE 5․0 exam is a critical step for architects seeking licensure, assessing their knowledge and skills across six divisions․ It evaluates their ability to manage projects, communicate effectively, and apply technical expertise․ The exam includes multiple-choice questions, case studies, and graphic vignettes, requiring both theoretical understanding and practical application․ Candidates must demonstrate proficiency in areas like project management, construction, and evaluation․ The exam format is designed to reflect real-world scenarios, ensuring architects are prepared for professional challenges․ Study guides play a pivotal role in helping candidates navigate this comprehensive assessment, providing structured resources to master the exam’s diverse content and format․

Importance of Study Guides in Exam Preparation

Study guides are indispensable for ARE 5․0 exam preparation, offering structured resources to master complex topics․ They provide comprehensive coverage of all six exam divisions, ensuring candidates understand key concepts and apply knowledge effectively․ With detailed explanations, practice questions, and real-world examples, study guides help bridge gaps in knowledge and build confidence․ They also include interactive tools like video guides and sample vignettes, simulating exam conditions․ By streamlining study efforts, these guides enable candidates to focus on weak areas and develop a strategic approach․ Their organized format ensures thorough preparation, making them a vital tool for achieving success in the ARE 5․0 exam․

Evolution of Study Guides for ARE 5․0

Study guides for ARE 5․0 have evolved significantly, transitioning from traditional materials to interactive, digitally enhanced resources․ They now incorporate video guides, practice exams, and updated content aligned with NCARB guidelines, ensuring comprehensive preparation for the exam․

Transition from Previous Versions to ARE 5․0

The transition to ARE 5․0 marked a significant shift in exam structure and content, prompting the development of updated study guides․ Previous versions focused on broader topics, while ARE 5․0 emphasizes six distinct divisions, requiring more specialized resources․ The merger of the ARE Handbook with the ARE Guidelines streamlined policies and procedures, making study materials more aligned with exam requirements․ This evolution introduced video guides, practice exams, and interactive tools, enhancing preparation․ NCARB’s continuous updates ensure study guides reflect current exam standards, helping candidates adapt to the new format and content effectively․

Key Enhancements in ARE 5․0 Study Materials

ARE 5․0 study materials have undergone significant enhancements to better align with the exam’s updated structure and content․ One major improvement is the inclusion of video guides for each division, providing example questions, solutions, and graphic vignettes․ Additionally, web-based practice exams offer a realistic test-taking experience, helping candidates assess their readiness․ Interactive tools and digital resources have been expanded, making study materials more accessible and engaging․ These enhancements ensure that candidates can effectively prepare for the six divisions of the exam, with resources tailored to the specific challenges of each section․ These updates reflect NCARB’s commitment to supporting candidates’ success in the ARE 5․0․

Key Features of ARE 5․0 Study Guides

ARE 5․0 study guides offer comprehensive coverage of all six exam divisions, interactive resources, and alignment with NCARB guidelines, ensuring a well-rounded and effective preparation experience․

Comprehensive Coverage of Exam Divisions

ARE 5․0 study guides provide in-depth coverage of all six exam divisions, ensuring candidates master each area․ From Practice Management to Construction & Evaluation, these guides detail key concepts, case studies, and practical scenarios․ They include video guides, sample questions, and solutions to graphic vignettes, mirroring the actual exam format․ This comprehensive approach helps candidates understand the exam structure and focus on weak areas․ By aligning with NCARB guidelines, the guides ensure relevance and accuracy, offering a one-stop resource for thorough preparation․ This breadth of material enables candidates to build a strong foundation and confidently tackle the exam’s diverse challenges․

Interactive Resources and Practice Exams

ARE 5․0 study guides incorporate interactive resources and practice exams to enhance preparation․ Video guides provide example questions with detailed solutions, while web-based practice exams simulate the actual test experience․ These tools help candidates familiarize themselves with the exam format, including graphic vignettes and case studies․ Interactive resources allow for self-assessment, identifying strengths and weaknesses․ Practice exams offer a realistic feel, enabling candidates to refine their time management and problem-solving skills․ These dynamic resources complement traditional study materials, ensuring a well-rounded and engaging preparation process․ By leveraging these tools, candidates can build confidence and readiness for the challenges of the ARE 5․0 exam․

Alignment with NCARB Guidelines

ARE 5․0 study guides are meticulously aligned with NCARB guidelines, ensuring candidates are fully prepared for the exam․ These resources mirror the exam structure and content, covering all six divisions as outlined by NCARB․ The study materials are designed to reflect the policies, procedures, and subject matter detailed in the ARE Handbook and Guidelines․ By adhering to NCARB standards, these guides provide accurate and relevant information, helping candidates understand exam format, content, and expectations․ This alignment ensures that study materials are both comprehensive and authoritative, offering a reliable path to exam success while staying true to NCARB’s established framework and requirements․

Structure of the ARE 5․0 Exam

The ARE 5․0 exam consists of six divisions, each testing specific skills and knowledge․ It includes multiple-choice questions, case studies, and graphic vignettes, ensuring comprehensive assessment of architectural expertise․

Breakdown of the Six Exam Divisions

The ARE 5․0 exam is divided into six distinct divisions, each focusing on critical aspects of architectural practice․ Practice Management covers business and professional responsibilities․ Project Management tests the ability to oversee projects effectively․ Programming & Analysis evaluates skills in understanding client needs and developing solutions․ Project Planning & Design assesses design development and documentation․ Project Development focuses on technical aspects like construction documentation and coordination․ Finally, Construction & Evaluation examines the ability to administer projects and assess their performance․ Each division requires a deep understanding of both theoretical and practical knowledge, ensuring comprehensive competence in architecture․

Content and Format of Each Division

Each division of the ARE 5․0 exam is designed to test specific skills and knowledge areas in architecture․ Practice Management includes questions on firm management and professional ethics․ Project Management focuses on overseeing projects, while Programming & Analysis evaluates understanding of client needs․ Project Planning & Design tests design development and documentation skills․ Project Development covers technical aspects like construction documentation․ Construction & Evaluation assesses project administration and evaluation․ The format varies, with multiple-choice questions, case studies, and graphic vignettes․ This diverse approach ensures candidates demonstrate both theoretical knowledge and practical application, preparing them for real-world challenges in architectural practice․

Recommended Study Resources for ARE 5․0

Top resources include Hyperfine courses, Amber Books, PPI exam prep, and Black Spectacles, offering comprehensive materials, practice exams, and expert guidance tailored to the exam’s six divisions․

Hyperfine ARE 5․0 Study Courses

Hyperfine ARE 5․0 Study Courses are a top choice for exam preparation, offering comprehensive resources created by architects who have successfully passed the ARE 5․0 exams․ These courses provide detailed video guides for each exam division, complete with example questions, answers, and solutions to graphic vignettes․ Additionally, Hyperfine offers web-based practice exams that simulate the actual test experience, helping candidates assess their readiness․ The materials are designed to be user-friendly and accessible, ensuring that candidates can study efficiently․ Hyperfine’s unique approach focuses on practical application and real-world scenarios, making it an invaluable resource for achieving exam success․ Its architect-created content ensures relevance and accuracy․

Amber Books Study Materials

Amber Books Study Materials are a popular choice for ARE 5․0 preparation, designed to simplify and streamline the study process․ These resources are known for their clear and concise explanations, making complex topics more accessible․ Amber Books offers a risk-free monthly subscription, allowing candidates to access materials without long-term commitments․ Their study guides are frequently referenced by other resources, such as Hyperfine and Jenny’s Notes, highlighting their reliability․ By focusing on essential content, Amber Books helps candidates prioritize their study time effectively․ This approach ensures that learners can master key concepts without unnecessary complexity, making it a valuable tool for exam success․

PPI ARE 5․0 Exam Prep

PPI ARE 5․0 Exam Prep is a top choice for candidates seeking comprehensive study materials․ Known for its all-inclusive approach, PPI offers detailed guides, practice exams, and resources tailored to each exam division․ Their study materials are praised for clarity and effectiveness, making them a favorite among architects․ PPI’s structured format ensures candidates cover all necessary topics efficiently․ With a focus on practical application, their resources align closely with NCARB guidelines, providing a reliable path to exam success․ PPI’s commitment to quality and thorough preparation makes it a trusted name in ARE 5․0 study materials, helping candidates achieve their professional goals․

Black Spectacles Study Materials

Black Spectacles is the first NCARB-approved online provider of ARE 5․0 study materials, offering comprehensive resources for all six exam divisions․ Their study guides include video tutorials, practice exams, and interactive tools designed to simulate real exam conditions․ Known for their structured approach, Black Spectacles provides in-depth explanations of complex topics, making them accessible to candidates․ Their materials are regularly updated to align with NCARB guidelines, ensuring relevance and accuracy․ With a focus on practical application, Black Spectacles has become a popular choice among architects seeking a modern, effective way to prepare for the ARE 5․0 exam and achieve professional licensure․

Community and Support for ARE 5․0 Candidates

The ARE 5․0 Community Forum offers a platform for candidates to connect, ask questions, and access resources, fostering collaboration and support throughout the exam preparation journey․

ARE 5․0 Community Forum

The ARE 5․0 Community Forum is a vibrant online space where candidates share insights, discuss challenges, and access expert advice․ It serves as a central hub for connecting with peers, joining study groups, and seeking guidance from NCARB experts․ Members can engage in discussions, ask test-related questions, and gain valuable tips from those who have successfully passed the exam․ The forum also hosts resources like video guides, sample questions, and solutions to graphic vignettes, making it an indispensable tool for exam preparation․ By fostering collaboration and knowledge exchange, the forum helps candidates stay motivated and well-prepared for the ARE 5․0․

Study Groups and Peer Support

Study groups and peer support are crucial for ARE 5․0 candidates, fostering collaboration and shared learning experiences․ These groups provide a structured environment to discuss challenging topics, review study materials, and gain diverse perspectives․ Many candidates utilize resources like Hyperfine study courses and Amber Books, which are often recommended within these groups․ Peer support helps alleviate stress and maintains motivation, while collective problem-solving enhances understanding of complex exam content․ By leveraging shared knowledge and resources, study groups empower candidates to approach the exam with confidence and a well-rounded preparation strategy, ultimately improving their chances of success․ This collaborative approach is invaluable․

Study Strategies for ARE 5․0 Success

Effective strategies include active learning techniques, prioritizing challenging areas, and consistent practice․ Utilize study guides, practice exams, and peer support to stay focused and achieve exam readiness․

Time Management and Study Plans

Effective time management is crucial for ARE 5․0 success․ Create a structured study plan, allocating specific hours to each exam division based on difficulty and familiarity․ Prioritize challenging areas and use practice exams to assess progress․ Break study material into manageable sections, focusing on active learning techniques like flashcards and concept mapping․ Regularly review NCARB guidelines and Hyperfine study courses for clarity․ Utilize Amber Books and PPI resources to streamline preparation․ Join study groups or forums for peer support and accountability․ Consistency is key; dedicate time daily to maintain momentum and ensure thorough coverage of all topics before exam day․

Effective Use of Study Guides

Maximizing the potential of ARE 5․0 study guides requires a strategic approach․ Begin by integrating Hyperfine and Amber Books materials into your daily routine, focusing on weak areas identified through practice exams․ Utilize PPI resources for in-depth explanations and NCARB-aligned content to ensure compliance with exam standards․ Incorporate interactive tools, such as video guides and graphic vignettes, to enhance understanding․ Regularly review and apply concepts to real-world scenarios, reinforcing retention․ Combine study guides with active learning techniques like flashcards and concept maps for better engagement․ Consistency and adaptability are key; adjust your study plan based on progress and feedback to optimize results․

Practice Exams and Their Role in Preparation

Practice exams simulate real exam conditions, helping candidates identify weaknesses and improve time management․ They provide a true feel for the exam format and content․

Benefits of Taking Practice Exams

Practice exams are crucial for ARE 5․0 preparation, offering a realistic simulation of the actual test experience․ They help candidates familiarize themselves with the exam format, content, and timing․ By identifying knowledge gaps, practice exams enable focused studying and improvement․ Additionally, they enhance time management skills, ensuring candidates can complete questions within the allotted time․ Regular practice builds confidence and reduces exam-day anxiety․ Many resources, like NCARB’s official practice exams, provide detailed feedback and sample questions, mirroring the real exam environment․ This hands-on approach ensures candidates are well-prepared and confident when taking the actual ARE 5․0 divisions․

Accessing NCARB Practice Exams

NCARB offers official practice exams for ARE 5․0, providing candidates with a realistic testing experience․ These exams include sample questions, graphic vignettes, and solutions to help candidates assess their readiness․ Access to these resources is typically available through the NCARB website or associated platforms․ Candidates can sign up for web-based practice exams, which simulate the actual exam environment․ Additionally, video guides are available for each division, offering example questions with detailed explanations․ These tools are designed to familiarize candidates with the exam format and content, ensuring they are well-prepared for the challenges of the ARE 5․0․ Regular use of these resources is highly recommended․

Future of ARE Study Guides

Future ARE study guides will leverage digital advancements, offering interactive tools and continuous updates to align with NCARB guidelines, ensuring candidates receive the most relevant and effective resources․

Digital Advancements in Study Materials

Digital advancements in ARE 5․0 study materials are revolutionizing exam preparation․ Video guides now provide example questions with detailed solutions, while web-based practice exams simulate real test conditions․ Interactive tools, such as graphic vignette solutions, enhance understanding․ Online platforms like Hyperfine and Black Spectacles offer architect-created content, ensuring relevance and accuracy․ Additionally, resources like Amber Books and PPI provide comprehensive digital libraries, streamlining study processes․ These advancements ensure candidates can access materials anytime, anywhere, fostering a more flexible and efficient study experience․ Digital updates also keep materials current with NCARB guidelines, ensuring candidates are well-prepared for the evolving exam format․

Continuous Updates and Improvements

ARE 5․0 study guides undergo regular updates to align with NCARB guidelines and exam changes․ These updates ensure candidates receive the most relevant and accurate information․ The integration of feedback from candidates and educators further refines study materials, addressing common challenges․ Digital platforms now allow for real-time updates, keeping resources current․ This continuous improvement ensures study guides remain effective tools for exam preparation․ Regular revisions also reflect evolving industry standards, helping candidates stay informed about the latest exam content and policies․ These updates are crucial for maintaining the quality and relevance of study materials in supporting candidates’ success․

ARE 5․0 study guides are indispensable tools for architects aiming to excel in the exam․ They provide comprehensive coverage, interactive resources, and alignment with NCARB guidelines, ensuring well-rounded preparation․ The integration of practice exams, community support, and continuous updates enhances their effectiveness․ By leveraging these resources, candidates can strategically manage their study plans and effectively utilize study guides to achieve success․ The evolution of study materials reflects a commitment to meeting the needs of modern learners, ensuring they remain relevant and impactful․ Ultimately, these guides empower architects to confidently navigate the exam and advance their professional careers․

tera barcode scanner manual pdf

Welcome to the Tera Barcode Scanner Manual, your comprehensive guide to setup, troubleshooting, and optimal performance. This manual covers key features, configurations, and advanced settings for seamless scanning experiences.

Overview of the Tera Barcode Scanner

The Tera Barcode Scanner is a versatile and high-performance scanning solution designed for efficient barcode reading. Available in both wired and wireless models, it supports 1D and 2D barcodes, ensuring compatibility with various applications. With advanced features like battery level indicators, rechargeable batteries, and plug-and-play functionality, it offers seamless integration into workflows. The scanner is built for durability, with models featuring extreme drop resistance and long-lasting performance. Its user-friendly design and customizable settings make it ideal for retail, healthcare, and industrial environments, providing reliable scanning experiences.

Key Features and Benefits

The Tera Barcode Scanner offers advanced features like wireless and wired connectivity, battery level indicators, and rechargeable batteries for uninterrupted use. It supports both 1D and 2D barcodes, ensuring versatility across applications. High-speed scanning and plug-and-play functionality enhance efficiency. Durable designs, including extreme drop resistance, make it suitable for demanding environments. Customizable settings and programmable barcodes allow tailored solutions. Its user-friendly interface and reliable performance make it an ideal choice for businesses seeking accurate and efficient scanning solutions.

System Requirements and Compatibility

The Tera Barcode Scanner supports Windows, macOS, Android, and iOS systems. It offers Bluetooth HID and 2.4GHz wireless connectivity for seamless integration with various devices.

Supported Operating Systems

The Tera Barcode Scanner is compatible with Windows, macOS, Android, and iOS systems. It supports Bluetooth HID pairing for Android and iOS devices, ensuring seamless connectivity. Additionally, the scanner works with Windows and macOS via 2.4GHz wireless or USB connections, making it versatile for various operating environments. This broad compatibility ensures efficient performance across different platforms, catering to diverse user needs and preferences.

Hardware Requirements

The Tera Barcode Scanner requires a USB port for wired connections or a compatible wireless receiver for 2.4GHz connectivity. It supports rechargeable batteries, with models like the Tera 5100 featuring long-lasting power. Ensure your device has Bluetooth capabilities for HID pairing or USB-C connectivity for virtual serial port functionality. The scanner is designed for plug-and-play operation, with no additional drivers needed for most operating systems. Proper hardware setup ensures reliable performance and seamless integration with your system.

Installation and Setup

Install the Tera Barcode Scanner via wired USB or wireless 2.4GHz connection. For wireless, scan the 2.4G mode barcode and pair with the USB receiver. Bluetooth HID pairing is also supported for compatible devices. Ensure proper configuration by scanning setup barcodes from the manual for optimal functionality.

Wired Connection Setup

Connect the Tera Barcode Scanner using the provided USB cable to a compatible port on your device. The scanner will automatically install necessary drivers. No additional software is required for basic functionality. Once connected, the scanner is ready for use in manual trigger mode. Ensure the USB connection is secure for reliable data transmission. Refer to the manual for troubleshooting USB-related issues or configuring advanced settings. This setup ensures a stable and straightforward scanning experience.

Wireless Connection Setup

For wireless setup, scan the 2.4GHz mode barcode in the manual to enable wireless functionality. The scanner will connect to the last paired USB receiver. For Bluetooth HID pairing, scan the Bluetooth HID symbol, then pair your device with “Bar-Code Scanner HID.” Ensure Bluetooth is enabled and select the scanner from the available devices. The scanner beeps once paired successfully. Refer to the manual for additional Bluetooth settings and troubleshooting wireless connectivity issues to ensure a smooth scanning experience.

Basic Operations

Master essential functions like scanning modes and interface navigation. Learn to operate trigger modes, manage settings, and optimize scanning efficiency for daily tasks with ease.

Scanning Modes

The Tera Barcode Scanner offers multiple scanning modes to suit different needs. Manual Trigger Mode allows precise control by pulling the trigger for each scan. Continuous Scan Mode enables non-stop scanning, ideal for bulk operations. Sensor-activated Mode automatically scans when a barcode is detected, enhancing efficiency. Each mode can be easily switched by scanning specific configuration barcodes found in the manual. These modes ensure flexibility and adaptability for various environments, making the scanner versatile for both manual and automated workflows.

Navigating the Interface

The Tera Barcode Scanner features an intuitive interface with a clear display showing battery level, time, and status. The display provides real-time feedback, including scanned data and connection status. Use the Up and Down buttons to navigate through settings and clear counters. Hold both buttons to return to the Home Screen. The trigger activates scanning, while the display offers visual cues for battery life and connectivity. This user-friendly design ensures easy operation and quick access to essential functions, streamlining your workflow efficiently.

Advanced Features

The Tera Barcode Scanner offers advanced features like programmable barcodes, custom configurations, and special character support, enabling tailored solutions for specific scanning needs and environments.

Programming Barcodes

Programming barcodes on the Tera scanner allows customization of settings like keyboard layouts, prefixes, and suffixes. Use specific barcodes to enable features such as time stamps or special characters. Refer to the control character chart in the manual for detailed configurations. Scan the appropriate codes to modify settings, ensuring optimal performance for your scanning needs. This feature enhances functionality, making the scanner adaptable to various environments and requirements.

Custom Configurations

Custom configurations on the Tera barcode scanner allow users to tailor settings to specific needs. Modify keyboard layouts, add prefixes or suffixes, and enable special characters for enhanced functionality. Use the ASCII chart to program custom characters and configure timestamps for data tracking. These settings ensure the scanner adapts to diverse environments, improving efficiency and accuracy in various applications. Refer to the manual for detailed steps to implement custom configurations effectively.

Scan Modes and Symbologies

Explore scan modes like Manual Trigger, Continuous, and Sensor-Activated, and discover supported symbologies such as UPC, EAN, Code 39, and QR codes for versatile scanning capabilities.

Supported Barcode Symbologies

The Tera barcode scanner supports a wide range of 1D and 2D symbologies, including UPC-A, UPC-E, EAN-8, EAN-13, Code 39, and QR codes. It also supports Codabar (NW-7) and Code 32 for specialized applications. Users can enable or disable specific symbologies based on their needs, ensuring accurate and efficient scanning. The scanner’s flexibility makes it suitable for various industries, from retail to healthcare. Refer to the manual for detailed instructions on configuring symbology settings to optimize performance for your specific use case.

Configuring Scan Settings

Configure your Tera barcode scanner to meet specific needs by adjusting settings like illumination lights, beeper volume, and vibration. Enable or disable symbologies such as UPC-A, EAN-13, or QR codes. Customize scan modes, including manual trigger, continuous, or sensor-activated scanning. Set prefixes, suffixes, or timestamps for data formatting. Adjust power timeout and USB communication settings for efficiency. Refer to the manual for detailed steps to optimize performance and tailor the scanner to your workflow requirements. Proper configuration ensures accurate and reliable scanning in various environments.

Display Layout and Status Indicators

The Tera scanner’s display shows connection status, battery level, time, and scanned data. Status indicators include beeps, vibrations, and visual cues for errors or successful scans.

Understanding the Display

The Tera scanner’s display provides essential information at a glance. It shows the connection status, battery level, current time, and scanned data counter. The display also indicates scan success or errors through visual cues. Users can navigate using the Up and Down buttons to access menus or clear counters. The screen layout is intuitive, ensuring quick access to settings and real-time feedback during operations. Customizable elements like keyboard layouts and symbologies enhance user experience, making the scanner adaptable to various workflows and preferences.

Interpreting Status Indicators

The Tera scanner uses status indicators to provide real-time feedback. The beeper and vibration settings alert users of successful scans or errors. LED lights indicate connection status, with blue for Bluetooth and green for 2.4GHz wireless. A flashing red light signals low battery, while steady red indicates charging. Illumination lights improve scanning in low-light conditions. These indicators help users quickly identify the scanner’s operational state, ensuring efficient troubleshooting and smooth workflow management. Understanding these cues is essential for optimal performance and maintenance of the device.

Troubleshooting Common Issues

Resolve connectivity issues by restarting the scanner or checking wireless settings. Address scan errors by cleaning the lens or updating firmware. Refer to the manual for detailed solutions.

Resolving Connectivity Problems

To resolve connectivity issues, restart the scanner and ensure it is properly paired with your device. For wireless setups, scan the 2.4GHz mode barcode or Bluetooth HID symbol to establish a connection. Verify that the USB receiver is plugged in and recognized by your system. If using Bluetooth, ensure your device is discoverable and pair the scanner through settings. For persistent issues, reset the scanner to factory defaults or consult the manual for advanced troubleshooting steps.

Addressing Scan Errors

To address scan errors, ensure the barcode is clean and free from damage. Verify that the scanner is configured to read the specific symbology being used. Clean the lens regularly to maintain clarity. Check that the scanner is properly aligned with the barcode and within the recommended scanning distance. If issues persist, reset the scanner to factory defaults or refer to the troubleshooting section in the manual for advanced solutions to optimize scanning accuracy and performance.

Maintenance and Care Tips

Regularly clean the scanner lens with a soft cloth to ensure clarity. Update firmware periodically for optimal performance. Store the device in a dry, cool environment to maintain functionality and longevity.

Cleaning the Scanner

To maintain optimal performance, clean the scanner regularly. Turn off the device and gently wipe the lens with a soft, dry cloth. For stubborn smudges, lightly dampen the cloth with water, but avoid harsh chemicals. Ensure the scanner is dry before use to prevent damage. Regular cleaning prevents dust and debris from affecting scan accuracy. Refer to the manual for detailed cleaning instructions to keep your Tera Barcode Scanner in prime condition.

Updating Firmware

Regular firmware updates ensure your Tera Barcode Scanner performs optimally. To update, connect the scanner to your device and navigate to the firmware section in the manual. Scan the provided firmware update barcode to initiate the process. Follow on-screen instructions to complete the update. Once done, restart the scanner to apply changes. For synchronization issues, contact Tera customer support for assistance. Keeping firmware updated enhances functionality and resolves potential bugs.

Warranty and Support Information

Your Tera Barcode Scanner is backed by a comprehensive warranty and dedicated support. For warranty details, visit the official Tera website or contact customer support directly.

Warranty Details

Your Tera Barcode Scanner is protected by a comprehensive warranty program, ensuring coverage for manufacturing defects and repairs. The warranty period varies by model and region, typically ranging from one to two years. For specific details, refer to the official Tera website or the PDF manual provided with your scanner. Warranty coverage includes repairs and replacements for faulty components, excluding damage caused by misuse or normal wear and tear. Register your product to validate warranty terms and ensure uninterrupted support services.

Contacting Customer Support

For assistance with your Tera Barcode Scanner, contact customer support via phone, WhatsApp, or email. Visit the official Tera website for contact details and additional resources. Support is available to address troubleshooting, configuration, and warranty inquiries. Refer to the manual for specific contact information and regional support options. Tera also provides multilingual support, with user manuals available in Spanish, French, Italian, and German. For quick access, scan the QR code in the manual to visit their website directly.

Optimal Performance Tips

Ensure optimal performance by cleaning the scanner regularly, using proper lighting conditions, and selecting the right scan mode for your environment. Refer to the manual for detailed tips.

Best Practices for Scanning

For optimal scanning, ensure barcodes are clean, undamaged, and well-lit. Adjust the scanner’s illumination settings based on ambient light conditions. Regularly clean the lens to avoid smudges. Use the appropriate scan mode (manual, continuous, or sensor-activated) for your workflow. Keep the scanner’s firmware updated to enhance performance. Avoid extreme temperatures or humidity. Test barcodes with different symbologies to ensure compatibility. Refer to the manual for specific settings like beeper volume and vibration for a seamless experience.

Environmental Considerations

Ensure the Tera Barcode Scanner operates in environments with temperatures between 32°F and 122°F (0°C to 50°C) and humidity below 80%. Avoid direct sunlight or extreme conditions. Store the scanner in a dry, cool place when not in use. Prevent exposure to dust, moisture, or chemicals. Handle the device gently to avoid drops or impacts. Use the provided charging cradle and avoid extreme temperatures during charging. Adhere to these guidelines to maintain performance and extend the scanner’s lifespan.

The Tera Barcode Scanner Manual provides a comprehensive guide to optimizing your scanning experience. From setup to advanced features, this manual ensures you maximize efficiency and accuracy. By following the tips and best practices outlined, you can enhance performance and extend the scanner’s lifespan. Explore all features, troubleshoot common issues, and maintain your device for reliable operation. For further assistance, refer to the support resources provided. Happy scanning with your Tera Barcode Scanner!

guide physical therapy practice

The Guide to Physical Therapist Practice is a foundational document by the American Physical Therapy Association (APTA) that outlines the role, scope, and standards of physical therapy practice. It serves as a dynamic blueprint for understanding professional responsibilities, clinical decision-making, and patient/client management, ensuring evidence-based and ethical care.

This guide is essential for educators, students, and clinicians, providing updated insights into the evolving profession and emphasizing patient-centered approaches. It is now available as an online subscription, Guide 3.0, offering accessible and continually updated resources for practitioners.

1.1 What is the Guide?

The Guide to Physical Therapist Practice is a foundational document developed by the American Physical Therapy Association (APTA) that describes the scope, roles, and best practices in physical therapy. It outlines professional responsibilities, clinical decision-making, and patient/client management, emphasizing evidence-based care and ethical considerations; Available as Guide 3.0, it provides updated insights and resources for educators, students, and clinicians, serving as a comprehensive reference for the profession.

1.2 Importance of the Guide

The Guide to Physical Therapist Practice is essential for standardizing and advancing the profession. It ensures consistency in practice, promotes quality care, and provides a framework for patient/client management.

The guide serves as a vital resource for educators, students, and clinicians, shaping professional development and policy. It also aids in communicating the value of physical therapy to insurers, policymakers, and other healthcare professionals, ensuring effective and ethical practice across all settings.

1.3 History and Evolution

The Guide to Physical Therapist Practice has evolved significantly since its introduction, reflecting advancements in the field. Initially developed to define the scope of practice, it has undergone revisions to incorporate evidence-based practices, ethical considerations, and technological advancements.

The latest version, Guide 3.0, transitions from print to an online subscription, offering dynamic updates and expanded resources. This evolution ensures the guide remains a relevant and comprehensive tool for the profession, adapting to the changing healthcare landscape and professional needs.

Purpose of the APTA Guide

The APTA Guide provides a framework outlining the scope, standards, and best practices for physical therapy, ensuring ethical, evidence-based, and patient-centered care. It helps therapists navigate complex patient management, align interventions with professional responsibilities, and promote high-quality outcomes across diverse healthcare settings.

2.1 Scope of Physical Therapy Practice

Physical therapy practice encompasses a broad range of services aimed at promoting health, preventing disability, and restoring function. It includes evaluation, diagnosis, and treatment of individuals across various settings, such as orthopedics, neurology, pediatrics, and geriatrics. Therapists use evidence-based techniques, including manual therapy, exercise, and education, to address musculoskeletal, neuromuscular, and cardiovascular conditions. The scope also involves promoting wellness and managing chronic diseases, ensuring comprehensive care tailored to individual needs.

2.2 Roles in Various Healthcare Settings

Physical therapists play diverse roles across healthcare settings, including hospitals, outpatient clinics, schools, and private practices. They specialize in areas like orthopedics, neurology, pediatrics, and geriatrics, addressing unique patient needs. In hospitals, they focus on rehabilitation post-surgery or illness, while in schools, they support children with disabilities. Therapists also work in sports settings, promoting injury recovery and prevention. Their roles include patient evaluation, treatment planning, and using techniques like manual therapy and exercise to improve mobility and quality of life.

2.3 Promoting Quality Care

The APTA Guide emphasizes evidence-based practices and ethical standards to ensure high-quality patient care. It advocates for patient-centered approaches, tailoring interventions to individual needs. By aligning practices with professional responsibilities, the guide helps therapists improve care delivery, enhance patient outcomes, and maintain ethical integrity. This focus on quality ensures that physical therapy services are effective, safe, and responsive to patient needs across all healthcare settings.

Evidence-Based Practices

Evidence-based practices integrate research, clinical expertise, and patient values to guide physical therapy interventions. The APTA Guide promotes the use of validated research and outcome measures to ensure effective care.

3.1 Definition and Principles

Evidence-based practices in physical therapy involve the integration of research evidence, clinical expertise, and patient values to guide decision-making. The APTA Guide emphasizes the use of systematic reviews, clinical guidelines, and outcome measures to ensure effective care. Research informs interventions, while clinical expertise tailors treatments to individual needs; Patient preferences and values are central to this approach, ensuring care is both effective and patient-centered. This framework promotes continuous improvement in practice and outcomes.

3.2 Role of Research in PT

Research is the cornerstone of evidence-based physical therapy, driving advancements in clinical practice. It informs the development of effective interventions, validates treatment outcomes, and ensures patient care is grounded in scientific evidence. The APTA Guide highlights the importance of systematic reviews and clinical trials in shaping practice patterns. By staying updated with research, physical therapists can deliver care that is both effective and aligned with current best practices, ultimately improving patient outcomes and advancing the profession.

3.3 Applying Evidence in Clinical Practice

Applying evidence in clinical practice ensures that physical therapy interventions are effective and patient-centered. The APTA Guide emphasizes the use of research findings and clinical expertise to inform decision-making. Tools like outcome measures and practice management software help track progress and refine care. By integrating evidence, therapists deliver high-quality, personalized treatments that address specific patient needs, improving overall outcomes and advancing the profession’s standards of care.

Patient/Client Management

Patient/client management involves a comprehensive approach to care, including initial assessments, personalized treatment plans, and continuous monitoring of progress. It ensures effective, patient-centered interventions and optimal outcomes.

4.1 Initial Assessment and Evaluation

The initial assessment and evaluation are critical steps in patient/client management, involving a thorough review of the patient’s history, clinical examination, and objective measures. This process identifies impairments, functional limitations, and participation restrictions, guiding the development of personalized treatment plans. The APTA Guide emphasizes the importance of evidence-based practices and patient-centered care during this phase, ensuring interventions are tailored to individual needs and goals.

4.2 Developing Treatment Plans

Developing treatment plans involves creating personalized strategies based on the initial assessment and evaluation. These plans incorporate evidence-based practices, patient goals, and clinical judgment to address impairments and functional limitations. The APTA Guide emphasizes the importance of collaboration with patients and other healthcare professionals to ensure interventions are effective and aligned with the patient’s needs. Treatment plans are dynamic, adapting as progress is monitored and outcomes are measured.

4.3 Monitoring Progress and Outcomes

Monitoring progress and outcomes is crucial for ensuring effective care. The APTA Guide emphasizes using standardized outcome measures to track patient improvements. Regular assessments help identify whether treatment goals are being met or if adjustments are needed. Data from these evaluations informs clinical decision-making, enabling therapists to refine interventions and enhance patient outcomes. This process ensures care remains patient-centered and aligned with evidence-based practices, ultimately improving the quality of physical therapy services provided.

Clinical Decision-Making Processes

The APTA Guide outlines clinical decision-making processes, emphasizing evidence-based practices and patient-centered care. It provides frameworks for examinations, interventions, and outcome assessments, ensuring effective and personalized treatment plans.

5.1 Examination Techniques

Examination techniques in physical therapy involve a comprehensive assessment of patient history, physical function, and movement patterns. The APTA Guide emphasizes evidence-based methods, including standardized tests and measures, to identify impairments and functional limitations. These techniques are designed to inform diagnosis, guide treatment planning, and monitor progress. By integrating patient-reported outcomes and clinical observations, physical therapists can develop precise interventions tailored to individual needs, ensuring effective and personalized care.

5.2 Diagnostic Criteria

Diagnostic criteria in physical therapy are standardized guidelines used to identify and classify conditions based on clinical findings. The APTA Guide emphasizes evidence-based criteria to ensure accurate diagnoses. These criteria often include patient history, clinical tests, and measurable outcomes. By applying these criteria, physical therapists can differentiate between conditions, determine the appropriate interventions, and develop targeted treatment plans. This systematic approach ensures consistent and reliable diagnostic processes in clinical practice.

5.3 Intervention Strategies

Intervention strategies in physical therapy are tailored to address specific patient needs, focusing on evidence-based techniques. These strategies may include manual therapy, exercises, and modalities to enhance mobility and strength. The APTA Guide emphasizes personalized approaches, ensuring interventions align with patient goals and clinical findings. By integrating these strategies, physical therapists aim to restore function, reduce pain, and improve overall well-being, promoting long-term recovery and independence for patients across various healthcare settings.

Preferred Practice Patterns

Preferred Practice Patterns in physical therapy are standardized approaches guiding care across various specialties, ensuring evidence-based and patient-centered interventions for optimal outcomes.

6.1 Orthopedic Physical Therapy

Orthopedic physical therapy focuses on treating musculoskeletal conditions, such as joint injuries, fractures, and chronic pain. It employs evidence-based techniques like manual therapy, exercise, and patient education to restore mobility and strength. This specialty emphasizes addressing movement dysfunctions and promoting recovery through personalized treatment plans, ensuring patients achieve optimal functional outcomes and reduce the risk of future injuries.

6.2 Neurological Rehabilitation

Neurological rehabilitation focuses on helping patients with nervous system disorders, such as stroke, spinal cord injuries, or traumatic brain injuries. Physical therapists use evidence-based techniques like motor training, balance exercises, and adaptive equipment to improve mobility and functional abilities. The goal is to enhance independence, reduce disabilities, and improve overall quality of life for individuals with neurological conditions, ensuring personalized care tailored to their specific needs and recovery goals.

6.3 Cardiovascular and Pulmonary Rehabilitation

Cardiovascular and pulmonary rehabilitation focuses on improving the functional abilities of patients with heart or lung conditions. Techniques include aerobic exercises, breathing exercises, and mobility training to enhance cardiovascular and respiratory function. The goal is to reduce symptoms, improve endurance, and promote overall health. Physical therapists design personalized care plans to address specific needs, ensuring safe and effective rehabilitation for patients with chronic or acute cardiovascular and pulmonary disorders.

Education and Training

Education and training are crucial for physical therapists, ensuring they stay updated on evidence-based practices and advancements. The APTA guide serves as a key resource for educators, students, and clinicians, providing foundational knowledge and promoting lifelong learning through continuing education and professional development opportunities.

7.1 Role of PT Education

Physical therapy education plays a vital role in preparing students to become competent practitioners. It provides foundational knowledge, clinical skills, and ethical practices essential for patient care. The APTA guide emphasizes evidence-based learning, ensuring future therapists are well-equipped to meet professional standards and adapt to evolving healthcare needs. Education also serves as a resource for educators and clinicians, fostering continuous improvement in teaching methodologies and clinical practice.

7.2 Continuing Education Requirements

Continuing education is crucial for physical therapists to maintain licensure and stay updated with advancements in the field. The APTA guide emphasizes the importance of lifelong learning to ensure evidence-based practices and adapt to new techniques. Regular professional development through courses, workshops, and online resources helps therapists enhance their skills, improve patient outcomes, and meet evolving healthcare demands. This commitment to ongoing education ensures high standards of care and professional growth.

7.3 Professional Development Opportunities

Professional development opportunities in physical therapy are vast, enabling therapists to specialize and advance their careers; The APTA guide highlights resources like workshops, conferences, and online courses through platforms such as PTNow. These opportunities allow therapists to explore specialized certifications, leadership training, and emerging techniques. Staying engaged with professional organizations and pursuing advanced education ensures therapists remain current with industry trends and enhance their clinical expertise, fostering continuous growth and adaptability in the field.

Outcomes and Measurements

Outcome measures are crucial for assessing patient progress and treatment effectiveness. Tools like standardized assessments and data analysis help track improvements, ensuring informed clinical decisions and enhanced care quality.

8.1 Importance of Outcome Measures

Outcome measures are essential for tracking patient progress and evaluating treatment effectiveness. They provide objective data to guide clinical decisions, ensuring interventions align with patient goals. By using standardized tools, physical therapists can communicate effectively with other healthcare providers, improving care coordination. Regular assessment of outcomes also helps identify areas for practice improvement, enhancing overall quality of care and patient satisfaction. Accurate measurement is vital for demonstrating the value of physical therapy services.

8.2 Tools for Assessing Patient Progress

Standardized assessments and outcome measures are critical for evaluating patient progress. Tools such as functional scales, questionnaires, and performance-based tests provide objective data. These instruments help track improvements in mobility, strength, and quality of life. Regular use of these tools enables physical therapists to adjust treatment plans, ensuring interventions remain effective and patient-centered. Accurate documentation of progress also facilitates communication with other healthcare providers, enhancing collaborative care and patient outcomes.

8.3 Using Data to Improve Practice

Data collected from patient assessments and outcomes is crucial for enhancing physical therapy practice. By analyzing trends and treatment effectiveness, therapists can refine interventions and improve care quality. Evidence-based practices are strengthened through continuous data evaluation, ensuring interventions align with best practices. Technology, such as practice management software, aids in tracking progress and identifying areas for improvement. This data-driven approach supports patient-centered care and fosters ongoing quality improvement in physical therapy settings.

Ethical Considerations

Ethical considerations in physical therapy practice emphasize professional integrity, patient confidentiality, and informed consent, ensuring respect for patient rights and autonomy in all interactions and decisions.

9.1 Professional Ethics in PT

Professional ethics in physical therapy are central to building trust and accountability. The APTA emphasizes ethical standards, ensuring patient-centered care, integrity, and respect for autonomy. Physical therapists must adhere to principles of honesty, confidentiality, and fairness, avoiding conflicts of interest. These ethical guidelines, outlined in the Guide to Physical Therapist Practice, promote a culture of professionalism and responsibility, fostering positive patient outcomes and public trust in the profession.

9.2 Patient Confidentiality and Privacy

Patient confidentiality and privacy are cornerstone principles in physical therapy practice. The APTA’s Guide to Physical Therapist Practice emphasizes the importance of safeguarding patient information and maintaining trust. Physical therapists must comply with legal standards like HIPAA to protect health data. Ensuring confidentiality involves secure storage of records, limited access to authorized personnel, and discreet communication. Respecting patient privacy fosters a safe and ethical therapeutic environment, essential for effective care and patient trust.

9.3 Informed Consent and Patient Rights

Informed consent is a critical aspect of ethical physical therapy practice, ensuring patients are fully aware of their treatment options, risks, and benefits. Physical therapists must obtain consent before initiating care, respecting patients’ autonomy and right to make informed decisions. This process fosters trust and accountability, ensuring care aligns with patients’ values and preferences. Ongoing education and clear communication are essential to maintain informed consent throughout treatment effectively.

Technology in Physical Therapy

Technology enhances physical therapy through telehealth, virtual PT, and practice management software, improving accessibility, efficiency, and patient engagement while streamlining clinical workflows and data management effectively.

10.1 Use of Technology in PT Practice

Technology is transforming physical therapy by enhancing efficiency and patient care. Tools like electronic health records (EHRs), telehealth platforms, and wearable devices enable remote monitoring and personalized treatment plans. Practice management software streamlines scheduling, billing, and data tracking, improving workflow. Additionally, virtual reality and AI-driven assessments provide innovative ways to measure progress and deliver targeted interventions, ensuring better outcomes and patient engagement in modern PT practice settings.

10.2 Telehealth and Virtual PT

Telehealth and virtual physical therapy have revolutionized care delivery, enabling remote consultations and treatment. Platforms now offer live video sessions, remote monitoring, and digital exercise programs. Virtual PT expands access for patients with mobility challenges or those in remote areas. Tools like virtual reality and AI-enhanced assessments further enhance personalized care. The APTA supports telehealth integration, ensuring ethical and evidence-based practices. This technology fosters continuity of care and improves patient engagement, making PT more accessible and efficient.

10.3 Practice Management Software

Practice management software is a vital tool for streamlining physical therapy operations. It simplifies scheduling, billing, and patient records, enhancing efficiency. These platforms often integrate with telehealth systems, ensuring seamless communication and data management. Advanced features like automated reminders and insurance verification reduce administrative burdens. By optimizing workflows, practice management software supports business growth and compliance with regulatory requirements, allowing therapists to focus on delivering high-quality patient care.

Marketing and Growing a PT Practice

Effective marketing strategies and building strong patient relationships are crucial for growing a PT practice. Leveraging online presence through digital marketing enhances visibility and attracts new clients, fostering sustainable growth.

11.1 Effective Marketing Strategies

Effective marketing strategies for a PT practice involve building a strong online presence through SEO, social media, and content marketing. Engaging with the community, offering free resources, and leveraging patient testimonials can attract clients. Email campaigns and referral programs also boost retention. By understanding the target audience and tailoring messages, PT practices can differentiate themselves and grow sustainably in a competitive market.

11.2 Building Patient Relationships

Building strong patient relationships is crucial for a thriving PT practice. Effective communication, empathy, and trust are foundational. Personalized treatment plans and patient education foster engagement and satisfaction. Regular follow-ups and open communication channels ensure patients feel valued. By prioritizing their needs and delivering compassionate care, physical therapists can build lasting relationships, enhancing patient loyalty and practice growth.

11.3 Online Presence and Digital Marketing

A strong online presence is vital for growing a physical therapy practice. A professional website, SEO optimization, and social media engagement attract patients. Utilize online directories and patient testimonials to build credibility. Leverage digital marketing tools like email newsletters and blogs to share expertise and promote services. APTA resources, such as PTNow, support digital strategies. Regularly updating content ensures visibility and attracts new clients, fostering practice growth and community engagement.

Financial Management

Effective financial management ensures sustainable practice operations, covering budgeting, insurance reimbursement, and billing processes. Utilizing practice management software streamlines operations, enhancing efficiency and profitability while maintaining compliance with regulations.

12.1 Managing Practice Finances

Managing practice finances involves budgeting, expense tracking, and optimizing revenue streams. It requires understanding insurance reimbursement, billing processes, and financial reporting. Effective financial planning ensures sustainability, allowing investments in staff, equipment, and technology. Regular audits and compliance with regulations are crucial. Utilizing practice management software can streamline operations, improve billing accuracy, and enhance overall financial efficiency, ensuring long-term success and growth of the physical therapy practice.

12.2 Insurance and Billing Processes

Understanding insurance and billing processes is critical for a successful physical therapy practice. This involves verifying patient benefits, submitting accurate claims, and managing reimbursements. Compliance with payer policies and regulatory requirements ensures timely payments. Effective billing practices, including proper coding and documentation, minimize denials and delays. Leveraging practice management software can streamline insurance verification, claims submission, and payment tracking, enhancing overall financial efficiency and reducing administrative burdens for physical therapy clinics.

hunter x2 manual pdf

The Hunter X2 Manual PDF is a comprehensive guide for installing, programming, and troubleshooting your irrigation controller. It offers essential tips to maximize performance and ensure optimal system use.

1.1 Overview of the Hunter X2 Controller

The Hunter X2 Controller is a state-of-the-art irrigation system designed for efficient water management. It offers advanced features like multiple program settings (A, B, and C) and Wi-Fi connectivity for remote control. With its user-friendly interface, the X2 allows for easy customization of irrigation schedules, including start times, run times, and water days. It also supports seasonal adjustments to adapt to changing weather conditions. The controller is compatible with sensors and accessories, ensuring optimal performance. Its integration with Hydrawise software enables smart irrigation management through a mobile app. Whether for residential or commercial use, the Hunter X2 is a versatile and reliable solution for modern irrigation needs.

1.2 Importance of the Manual for Optimal Performance

The Hunter X2 Manual PDF is essential for achieving optimal performance from your irrigation system. It provides detailed instructions for installation, programming, and troubleshooting, ensuring you can customize settings to meet specific needs. The manual offers tips for maximizing water efficiency and system longevity. By following the guide, users can avoid common mistakes and ensure smooth operation. The manual also serves as a quick reference for resolving issues, such as sensor problems or connectivity errors. Available as a downloadable PDF, it is easily accessible for anyone seeking to understand and maintain their Hunter X2 Controller effectively. This resource is crucial for both new and experienced users to unlock the full potential of their irrigation system.

Installation Guide

The Hunter X2 Manual PDF provides a detailed installation guide to ensure proper setup and functionality. It includes step-by-step instructions for physical installation and sensor connections, ensuring a smooth process.

2.1 Initial Setup and Physical Installation

The Hunter X2 Manual PDF provides a detailed guide for the initial setup and physical installation of the controller. It outlines the steps for mounting the unit, connecting wires, and powering the system. The manual emphasizes the importance of proper installation to ensure optimal performance and longevity. Instructions include securing the controller to a wall, connecting the 24VAC power supply, and wiring stations and sensors correctly. Additionally, it covers setting the date and time, which is crucial for scheduling irrigation programs. The guide also includes diagrams and troubleshooting tips for common installation issues, ensuring a smooth setup process for both novice and experienced users. By following these steps, you can ensure your Hunter X2 controller is installed correctly and ready for programming.

2.2 Connecting Sensors and Accessories

The Hunter X2 Manual PDF provides clear instructions for connecting sensors and accessories to enhance your irrigation system’s functionality. It guides you through installing rain sensors, soil moisture sensors, and other devices to optimize water usage. The manual explains how to wire these accessories to the controller, ensuring proper communication and operation. Additionally, it covers connecting the optional WAND for Hydrawise software integration, enabling remote monitoring and control. The guide also includes troubleshooting tips for sensor connectivity issues, such as checking wire connections and sensor settings. By following these steps, you can seamlessly integrate sensors and accessories, ensuring your irrigation system operates efficiently and conserves water effectively. Proper connections are vital for maintaining system performance and reliability.

Programming the Hunter X2 Controller

Programming the Hunter X2 Controller involves setting start times, run times, water days, and seasonal adjustments. It also allows managing multiple programs (A, B, and C) for flexibility.

3.1 Basic Programming: Start Times and Run Times

Basic programming on the Hunter X2 Controller involves setting start times and run times for each irrigation zone. Start times determine when watering begins, while run times specify how long each zone operates. These settings ensure efficient water usage and proper hydration for plants. The controller allows multiple start times per zone, providing flexibility for varying weather conditions. Run times can be adjusted based on soil type, plant species, and seasonal requirements. The manual provides step-by-step instructions for inputting these values using the controller’s interface. Once programmed, the system operates automatically, simplifying lawn and garden care. Regularly reviewing and adjusting these settings ensures optimal performance and water conservation.

3.2 Advanced Programming: Water Days and Seasonal Adjust

Advanced programming on the Hunter X2 Controller includes setting water days and seasonal adjustments for tailored irrigation management. Water days allow you to specify which days of the week the system will irrigate, ensuring compliance with local water restrictions. Seasonal adjust enables you to modify watering durations by a percentage, adapting to changing weather conditions throughout the year. For example, reduce water usage in winter or increase it during summer. These features optimize water conservation and system efficiency. The manual provides detailed guidance on configuring these settings, either directly on the controller or through the Hydrawise software. Adjusting water days and seasonal settings ensures your irrigation system remains efficient and responsive to environmental changes. Regular updates to these settings are recommended for optimal performance.

3.3 Managing Multiple Programs (A, B, and C)

The Hunter X2 Controller allows you to create and manage up to three independent programs (A, B, and C), each with unique start times, run times, and water days. This feature is ideal for managing different irrigation zones or schedules within the same system. Programs can run simultaneously or sequentially, depending on your setup. Each program can be customized to address specific watering needs, such as lawn areas, gardens, or drip irrigation systems. The manual provides detailed instructions on how to configure and manage these programs, ensuring flexibility and precision in your irrigation system. This feature is particularly useful for large or complex landscapes requiring varied watering schedules. By organizing programs effectively, you can optimize water usage and system performance.

Troubleshooting Common Issues

The Hunter X2 Manual PDF provides detailed solutions for diagnosing and resolving common issues, such as station malfunctions, sensor problems, and system resets, ensuring smooth operation.

4.1 Diagnosing Station and Sensor Problems

Diagnosing issues with stations and sensors is crucial for maintaining optimal irrigation performance. The Hunter X2 Manual PDF guides users through identifying and resolving common problems. Start by checking station connections and ensuring sensors are properly linked. Use the controller’s diagnostic tools to detect faults, such as flashing lights or beeps, which indicate specific errors. For sensors, verify wiring and calibration, as incorrect settings can disrupt irrigation schedules. The manual also provides step-by-step instructions for running manual tests on individual stations to isolate issues. By following these steps, users can quickly identify and address malfunctions, ensuring efficient system operation. Regular checks and troubleshooting tips are included to prevent future problems.

4.2 Resetting the Controller and System

Resetting the Hunter X2 Controller and system is a straightforward process to restore default settings or resolve persistent issues. The Hunter X2 Manual PDF provides clear instructions for this procedure. To reset, press and hold the “OFF” and “MANUAL” buttons simultaneously for 10 seconds until the display clears. This action will reset all settings to factory defaults, including start times, run times, and water days. Note that custom programs (A, B, and C) will be erased, so reprogramming may be necessary. For a partial reset, refer to the manual’s troubleshooting section. Always back up your settings before performing a full reset. This feature ensures a clean slate for system operation and helps resolve software-related issues effectively. Detailed steps are outlined in the manual for a smooth reset process.

Manual Operations and Test Runs

The Hunter X2 Manual PDF explains how to perform manual operations and test runs. Run stations manually or test all stations in sequence to ensure proper system function and identify issues quickly.

5.1 Running Stations Manually

Running stations manually on the Hunter X2 allows you to test or operate individual zones without following the programmed schedule. This feature is useful for immediate watering needs or system testing. To run a station manually, press the Manual button, select the desired station, and adjust the run time as needed. The controller will activate the chosen station, and it will run for the specified duration. This function ensures that you can check for proper operation or address specific watering requirements quickly. The manual run feature does not interfere with the programmed schedule, making it a convenient tool for troubleshooting or maintenance. It also helps verify that each station is functioning correctly before or after programming adjustments. This capability is essential for ensuring the system operates efficiently and effectively.

5.2 Testing All Stations in Sequence

Testing all stations in sequence on the Hunter X2 is a convenient way to verify the operation of each zone in your irrigation system. This feature allows you to run each station one after another, ensuring that all components are functioning properly. To activate this test, press and hold the Manual button until the display shows “Test All Stations.” The controller will then cycle through each station in numerical order, running each for a default duration of 10 seconds. This feature is ideal for identifying issues such as poor water coverage, faulty solenoids, or wiring problems. By observing each station during the test, you can quickly diagnose and address any issues, ensuring your irrigation system operates efficiently. This sequential testing is a valuable tool for system maintenance and troubleshooting.

Advanced Features of the Hunter X2

The Hunter X2 offers advanced features like Wi-Fi Connectivity, enabling remote management through the Hydrawise software and Mobile App Control, allowing users to monitor and adjust settings effortlessly from anywhere.

6.1 Wi-Fi Connectivity and Remote Management

The Hunter X2 controller features advanced Wi-Fi connectivity, allowing users to manage their irrigation system remotely through the Hydrawise platform. This innovative feature enables seamless control and monitoring of watering schedules, ensuring optimal performance. With remote management, users can adjust start times, run times, and water days effortlessly from any location. The Hydrawise software integrates with the Hunter X2, providing real-time updates and customizable settings. Additionally, the Mobile App offers on-the-go access, allowing users to override schedules or check system status instantly. This feature enhances convenience and efficiency, making it easier to maintain a perfectly irrigated landscape. The Wi-Fi connectivity also ensures that the controller stays updated with the latest software improvements, guaranteeing peak performance and reliability.

6.2 Hydrawise Software Integration

The Hunter X2 controller seamlessly integrates with the Hydrawise software, a cloud-based platform designed for advanced irrigation management. This integration allows users to program and monitor their irrigation system remotely, ensuring optimal water usage and system performance. Through Hydrawise, users can adjust start times, run times, water days, and seasonal adjustments from any internet-connected device. The software also provides real-time notifications for system issues, such as sensor alerts or watering errors. By centralizing control, Hydrawise enhances the efficiency and convenience of managing the Hunter X2 controller. This feature is particularly useful for users who want to fine-tune their irrigation schedules or monitor their system’s performance without physical access to the controller. The integration ensures a smarter and more adaptable irrigation experience.

6.3 Mobile App Control and Monitoring

The Hunter X2 controller offers seamless control and monitoring through its dedicated mobile app, available for both iOS and Android devices. This app allows users to manage their irrigation system remotely, enabling them to start manual runs, adjust schedules, and monitor system status in real time; The app provides a user-friendly interface to access key features like start times, run times, and water days. It also sends notifications for system alerts, such as sensor activations or connectivity issues. With the mobile app, users can ensure their irrigation system operates efficiently, even when they’re not physically present. This feature enhances convenience and flexibility, making it easier to maintain optimal watering schedules and respond to system needs promptly. The app is a powerful tool for modern irrigation management.

Maintenance and Upkeep

Regular system checks and updates ensure the Hunter X2 operates smoothly. Follow best practices for longevity, including cleaning sensors and updating software to maintain optimal performance.

7.1 Regular System Checks and Updates

Regular system checks are crucial for maintaining the Hunter X2 controller’s performance. Ensure sensors are clean and free from debris, as dirty sensors can disrupt irrigation schedules. Inspect wiring connections to prevent issues like corrosion or loose contacts. Software updates are essential for accessing new features and fixing bugs. Use the Hydrawise platform to check for firmware updates and install them promptly. Additionally, verify that the controller’s date and time are accurate, as incorrect settings can affect watering schedules. For optimal functionality, review the system’s operation monthly and address any anomalies. Always refer to the Hunter X2 Manual PDF for detailed guidance on performing these checks and updates. Regular maintenance ensures your irrigation system runs smoothly and efficiently year-round.

7.2 Best Practices for Longevity

To ensure the Hunter X2 controller lasts for years, adopt best practices for maintenance. Regularly clean sensors and inspect wiring to prevent damage from corrosion or pests. Protect the controller from extreme temperatures and power surges by installing a high-quality surge protector. Avoid exposing the unit to direct sunlight or moisture, which can degrade internal components. Update the software via the Hydrawise platform to benefit from performance improvements and new features. Store backup copies of your irrigation programs to avoid losing settings during resets. Finally, perform seasonal checks to ensure all stations and sensors are functioning correctly. By following these practices, you can extend the lifespan of your Hunter X2 and maintain optimal irrigation performance.

Additional Resources

Access the Hunter X2 Manual PDF for free on Hunter’s official website or authorized dealer sites. Explore video tutorials and online support for troubleshooting and mastering the controller.

8.1 Downloading the Hunter X2 Manual PDF

The Hunter X2 Manual PDF is readily available for free download on Hunter Industries’ official website or through authorized dealer sites. This comprehensive guide provides detailed instructions for installation, programming, and troubleshooting. To access the manual, visit the official Hunter website, navigate to the support or resources section, and search for the Hunter X2 Controller Manual. Ensure you download the PDF from trusted sources to avoid unauthorized versions. Additionally, video tutorials and online support resources are available to complement the manual, offering step-by-step guidance for optimal use of the controller. Downloading the manual is a straightforward process, ensuring you have all the information needed to operate your irrigation system efficiently.

8.2 Video Tutorials and Online Support

Supplement your understanding of the Hunter X2 Controller with video tutorials and online support resources. These materials provide visual guidance for tasks like basic programming, manual runs, and integrating sensors. Official video tutorials are available on Hunter Industries’ website and YouTube channels, offering step-by-step instructions for setup, troubleshooting, and advanced features. Additionally, online forums and support pages offer solutions to common issues and tips for optimizing your irrigation system. These resources complement the Hunter X2 Manual PDF, ensuring you can resolve problems and explore features confidently. Utilize these tools to enhance your experience and maximize the controller’s functionality.

canon powershot sx30 is user guide

The Canon PowerShot SX30 IS is a high-performance bridge camera featuring a 35x optical zoom and 14.1 MP CMOS sensor, ideal for versatile photography needs.

1.1 Overview of the Camera

The Canon PowerShot SX30 IS is a versatile bridge camera designed for photographers seeking a balance between portability and advanced features. It boasts a 35x optical zoom lens, covering a wide focal range from 24mm to 840mm, and a 14.1-megapixel CMOS sensor for detailed images. Equipped with image stabilization, it reduces camera shake, ensuring sharper photos and smoother videos. The camera offers a range of shooting modes, including manual controls, making it suitable for both beginners and experienced photographers. Its ergonomic design and intuitive controls provide a comfortable shooting experience, catering to various photography needs.

1.2 History and Development of the PowerShot Series

The Canon PowerShot series debuted in the 1990s, revolutionizing compact photography with innovative features and user-friendly designs. Over the years, the series evolved, incorporating advanced technologies like optical zoom, image stabilization, and high-resolution sensors. The PowerShot SX30 IS, released in 2010, marked a significant milestone with its 35x optical zoom, the longest in the series at the time. This model built on the legacy of its predecessors, such as the SX20 IS, offering enhanced performance and versatility for photographers of all skill levels, solidifying its place in the PowerShot lineage;

Key Features of the Canon PowerShot SX30 IS

The Canon PowerShot SX30 IS boasts a 35x optical zoom, 14.1 MP CMOS sensor, and advanced image stabilization, delivering sharp, high-quality images across various shooting conditions.

2.1 35x Optical Zoom Lens

The Canon PowerShot SX30 IS features a powerful 35x optical zoom lens, offering a focal range of 24mm to 840mm (35mm equivalent). This versatile lens excels in capturing wide-angle landscapes and distant subjects with precision. The ultra-wide 24mm setting is ideal for group shots and scenic vistas, while the 840mm telephoto end enables detailed close-ups of wildlife or distant objects. Equipped with optical image stabilization, it minimizes camera shake, ensuring sharp images even at maximum zoom. This lens makes the SX30 IS a standout choice for photographers seeking flexibility and reach in various shooting scenarios.

2.2 14.1 Megapixel CMOS Sensor

The Canon PowerShot SX30 IS is equipped with a 14.1-megapixel CMOS sensor, delivering high-resolution images with excellent detail and clarity. This sensor works in conjunction with Canon’s DIGIC 4 image processor to enhance image quality, reduce noise, and improve color accuracy. It captures images up to 4320 x 3240 pixels, ensuring crisp and vibrant results. The CMOS sensor also supports HD video recording and provides reliable performance in various lighting conditions, making it suitable for both still photography and video capture. Its capabilities make it a robust choice for photographers seeking quality and versatility.

2.3 Image Stabilization Technology

The Canon PowerShot SX30 IS features advanced optical image stabilization, which minimizes camera shake and blur caused by hand movement or low light conditions. This technology ensures sharper images and smoother videos, especially when using the 35x zoom. By compensating for camera motion, it enhances overall image quality and allows for clearer results in challenging situations. The stabilization system is particularly effective during handheld shooting, making it ideal for capturing sharp photos and steady videos without a tripod.

Getting Started with the Canon PowerShot SX30 IS

Getting started with the Canon PowerShot SX30 IS involves unboxing, initial setup, charging the battery, and familiarizing yourself with its controls for optimal photography experiences effortlessly.

3.1 Unboxing and Package Contents

Upon unboxing the Canon PowerShot SX30 IS, you’ll find the camera, a battery pack NB-7L, stereo AV cable AVC-DC400ST, lens cap, and a CD-ROM containing software. The package also includes a detailed user guide in PDF format, accessible via Adobe Reader. These components ensure a smooth start to your photography journey, providing everything needed to begin capturing high-quality images and videos with ease.

3.2 Initial Setup and Charging the Battery

Start by inserting the NB-7L battery pack into the camera, ensuring it clicks securely into place. Charge the battery using the provided charger, avoiding overcharging to maintain its longevity. The charging process typically takes 1.5 to 2 hours. Once charged, the battery is ready for use. Refer to the user guide for detailed charging instructions and safety precautions to ensure proper setup and functionality of your Canon PowerShot SX30 IS.

3.3 Basic Camera Controls and Layout

The Canon PowerShot SX30 IS features an intuitive control layout designed for easy navigation. The mode dial on top allows quick access to shooting modes, while the zoom lever enables smooth control of the 35x optical zoom. The 2.7-inch vari-angle LCD screen provides clear previews and playback. Key buttons include the power button, shutter release, and video record button. The rear panel houses menu and navigation controls for adjusting settings. The battery and memory card slots are conveniently located at the base. Familiarizing yourself with this layout ensures efficient operation and enhances your shooting experience.

Shooting Modes and Options

The Canon PowerShot SX30 IS offers a variety of shooting modes, including Auto, Program AE, Aperture Priority, Shutter Priority, and Manual modes, as well as Scene Modes for specific conditions.

4.1 Auto Mode for Beginners

The Canon PowerShot SX30 IS’s Auto Mode is designed for beginners, automatically adjusting settings for effortless photography. It simplifies operation by handling focus, exposure, and color balance, ensuring great results without manual adjustments. Perfect for those new to photography, Auto Mode captures sharp, vibrant images in various conditions, from portraits to landscapes. Its intuitive design makes it easy to start shooting immediately, while still offering the versatility needed for different scenes.

4.2 Program AE (P), Aperture Priority (Av), Shutter Priority (Tv), and Manual (M) Modes

The Canon PowerShot SX30 IS offers advanced shooting modes for creative control. Program AE (P) mode automatically adjusts settings while allowing user tweaks. Aperture Priority (Av) lets you set the aperture for depth of field control, while Shutter Priority (Tv) enables manual shutter speed adjustments for motion effects. Manual (M) mode provides full control over both aperture and shutter speed for precise results. These modes cater to experienced photographers seeking customization, offering flexibility to capture images with specific artistic intent or technical requirements.

4.3 Scene Modes and Special Effects

The Canon PowerShot SX30 IS offers a variety of Scene Modes and Special Effects to enhance your photography. Scene Modes like Portrait, Landscape, Sports, and Night Scene optimize settings for specific situations. Special Effects such as Super Vivid, Fisheye, and Miniature Effect add creative flair to your images. These modes allow users to capture stunning photos with minimal effort, making it ideal for both casual and artistic shooting. The camera’s intuitive interface makes it easy to explore and apply these features, ensuring versatile and high-quality results in diverse conditions.

Menu Functions and Customization

The Canon PowerShot SX30 IS offers an intuitive menu system for customizing settings, allowing users to personalize their shooting experience with ease and precision.

5.1 Navigating the Menu System

The Canon PowerShot SX30 IS features an intuitive menu system designed for easy navigation. Users can access various settings using the arrow buttons and the FUNC./SET button. The menu is divided into shooting, playback, and setup options, allowing quick adjustments to settings like image stabilization, zoom, and flash. The system also provides clear explanations for each function, ensuring a smooth user experience. For detailed guidance, the PDF manual offers comprehensive instructions on navigating and customizing the menu system effectively.

5.2 Still Image Settings and Options

The Canon PowerShot SX30 IS offers a variety of still image settings to enhance your photography experience. Users can adjust resolution up to 14.1 megapixels and choose from compression options like Fine or Normal. The camera also supports multiple aspect ratios, including 4:3, 3:2, and 16:9. Additional settings include color accents, contrast, and saturation adjustments. Noise reduction options are available for low-light conditions, and the camera supports RAW image capture for advanced post-processing. These features provide flexibility and control, allowing photographers to tailor their images to specific creative goals.

5.3 Video Recording Settings and Options

The Canon PowerShot SX30 IS supports HD video recording with resolutions up to 720p at 30 frames per second. Users can choose from various video modes, including Miniature Effect and Super Slow Motion. The camera allows manual control over settings like white balance, focus, and exposure during recording. Optical zoom is available, though it operates more slowly in video mode to minimize noise. Image stabilization helps reduce camera shake, ensuring smoother footage. Videos are saved in MOV format with stereo sound, offering a balance of quality and convenience for capturing dynamic moments.

Advanced Features and Custom Settings

The Canon PowerShot SX30 IS offers customizable settings, including C1 and C2 modes, My Menu, and the ability to save favorite settings for personalized shooting efficiency.

6.1 Customizing the Camera for Personal Preferences

The Canon PowerShot SX30 IS allows users to tailor settings to their preferences, enhancing shooting efficiency. The C1 and C2 modes enable quick access to custom configurations, while My Menu lets you save frequently used settings. Additionally, users can assign functions to buttons and customize shooting defaults, such as autofocus and metering modes. These features ensure a personalized experience, making it easier to adapt the camera to individual shooting styles and preferences for optimal results in various photography scenarios.

6.2 Using the C1 and C2 Custom Modes

The Canon PowerShot SX30 IS features C1 and C2 custom modes, allowing users to save preferred settings for quick access. These modes enable photographers to tailor the camera to specific shooting scenarios, such as portraits or landscapes. By saving settings like aperture, shutter speed, and ISO, users can instantly switch between configurations, streamlining their workflow. This feature is particularly useful for those who frequently adapt to changing conditions, ensuring consistent results and enhancing creative control during shoots.

6.3 My Menu and Favorite Settings

The Canon PowerShot SX30 IS allows users to personalize their shooting experience with the My Menu feature. This option enables photographers to create a customized menu containing their most frequently used settings, such as ISO, white balance, and autofocus options. By organizing favorite settings in one place, users can quickly access them without navigating through multiple menus. This feature enhances efficiency and streamlines the workflow, making it ideal for photographers who prefer tailored control over their camera’s functionality. It also reduces distractions, allowing for a more focused and creative shooting process.

Image and Video Quality

The Canon PowerShot SX30 IS delivers high-quality images with its 14.1 MP CMOS sensor and 35x optical zoom, ensuring sharp details and vibrant colors. HD video recording is supported, and image stabilization minimizes blur, enhancing overall media capture.

7.1 Understanding Resolution and Compression Settings

Resolution determines the level of detail in your images, with the Canon PowerShot SX30 IS offering up to 4320 x 3240 pixels. Higher resolution captures more detail but increases file size. Compression, typically in JPEG format, reduces file size by sacrificing some image data. Lower compression preserves quality but results in larger files. Understanding these settings helps balance storage needs with image quality, ensuring optimal results for printing, sharing, or editing. Adjusting these settings is crucial for achieving your desired output in various photography scenarios.

7.2 Best Practices for Capturing High-Quality Photos

To capture high-quality photos with the Canon PowerShot SX30 IS, use the 35x optical zoom judiciously, ensuring stability with image stabilization. Shoot in well-lit conditions or use the flash sparingly to avoid overexposure. Focus on your subject using the AF lock feature for sharp results. Experiment with composition techniques like the rule of thirds and keep the horizon level. Use lower ISO settings for reduced noise and higher quality. Review images on the LCD and adjust settings as needed for optimal results in various lighting conditions.

7.3 Video Recording Tips and Tricks

For high-quality video with the Canon PowerShot SX30 IS, ensure the camera is stable using a tripod or image stabilization. Record in well-lit environments to minimize noise. Use the zoom sparingly during recording to avoid shaky footage. Enable continuous AF for sharp focus and use the wind filter to reduce noise. Monitor audio levels and consider an external microphone for clearer sound. Shoot in HD mode for the best resolution and review footage on the LCD to adjust settings as needed for optimal results.

Accessories and Compatible Equipment

The Canon PowerShot SX30 IS supports SD, SDHC, and SDXC memory cards for storage. It uses the NB-7L battery pack and is compatible with optional accessories like lens filters and external microphones.

8.1 Memory Cards and Storage Options

The Canon PowerShot SX30 IS is compatible with SD, SDHC, and SDXC memory cards, offering flexible storage solutions. For optimal performance, use high-speed cards with capacities up to 128GB. Ensure cards are formatted in the camera for proper functionality. Always choose reliable brands to prevent data loss. The camera supports Eye-Fi cards for wireless image transfer, enhancing convenience. Regularly back up your photos and videos to maintain your library and prevent accidental data loss. Proper card management ensures smooth operation and preserves your captured memories.

8.2 Batteries and Power Management

The Canon PowerShot SX30 IS uses the NB-7L battery pack, designed for reliable performance. Charge the battery using the provided charger or via USB for convenience. To extend battery life, enable the ECO mode, which reduces power consumption. Avoid overcharging, as it can degrade battery health. Use genuine Canon accessories to ensure optimal performance and safety. Regularly clean the battery terminals to maintain proper connections. For extended shooting sessions, consider carrying spare batteries or using an external power source. Proper power management ensures uninterrupted photography and video recording.

8.3 Lenses, Filters, and Other Accessories

The Canon PowerShot SX30 IS features a 35x optical zoom lens (24-840mm equivalent), offering versatility for wide-angle to telephoto shots. For enhanced protection and image quality, consider using UV or polarizing filters. The camera supports optional accessories like lens hoods to reduce glare and protect the lens. Additional accessories, such as cases or tripods, can improve portability and stability. Always use genuine Canon accessories or compatible third-party products to ensure optimal performance. Refer to the user manual for a list of recommended accessories and compatibility guidelines.

Maintenance and Care

Regularly clean the lens and camera body with a soft cloth to prevent dust and smudges. Update firmware for optimal performance and store the camera in a dry, cool place to maintain functionality and longevity.

9.1 Cleaning the Camera and Lens

Regular cleaning is essential to maintain the Canon PowerShot SX30 IS’s performance. Use a soft, dry cloth to wipe the camera body and lens, avoiding harsh chemicals. For stubborn smudges, dampen a microfiber cloth with distilled water or a lens cleaning solution, but avoid touching the lens surface excessively. Never use tissues or paper products, as they may scratch the lens. Clean the viewfinder and LCD screen gently with a microfiber cloth to ensure clear visibility. Proper cleaning prevents dust buildup and ensures sharp, clear images.

9.2 Updating Firmware and Software

Regularly updating the Canon PowerShot SX30 IS’s firmware and software ensures optimal performance and security. Visit Canon’s official website to check for the latest firmware version. Download the update to your computer, then connect the camera using the provided USB cable. Follow the on-screen instructions to complete the installation. Never interrupt the update process to avoid potential damage. After completion, verify the firmware version in the camera’s menu to confirm success. Updates often improve functionality, fix bugs, and enhance compatibility with new features or accessories.

9.3 Storing and Transporting the Camera

Proper storage and transportation of the Canon PowerShot SX30 IS are crucial to maintain its performance and longevity. Store the camera in a cool, dry place, away from direct sunlight and moisture. Use the provided lens cap to protect the lens from dust and scratches. When transporting, place the camera in a padded case or bag to prevent damage. Avoid exposing the camera to extreme temperatures or humidity, as this can harm internal components. Always handle the camera with care to ensure it remains in optimal condition for years of use.

Troubleshooting Common Issues

The Canon PowerShot SX30 IS may encounter issues like error messages, connectivity problems, or image quality concerns. Refer to the user manual for solutions and maintenance tips.

10.1 Common Error Messages and Solutions

The Canon PowerShot SX30 IS may display error messages like “Lens Error” or “Memory Card Error.” For lens issues, restart the camera or clean the lens gently. If a memory card error occurs, format the card in the camera or replace it. Other errors, such as “File Not Found,” can be resolved by updating the firmware or resetting the camera to default settings. Refer to the user manual for detailed troubleshooting steps and solutions to ensure optimal performance and resolve issues efficiently.

10.2 Resolving Connectivity and Transfer Issues

Connectivity issues with the Canon PowerShot SX30 IS can often be resolved by ensuring the camera is properly connected to your computer via the supplied USB cable. Check that the cable is undamaged and securely plugged in. If using a memory card reader, ensure it is compatible with your card type. Install the latest Canon software and drivers from the official website. Restart the camera and computer to establish a fresh connection. For wireless transfers, ensure Wi-Fi is enabled and the camera is connected to the same network as your device. Consult the user manual for detailed troubleshooting steps.

10.3 Fixing Image Quality Problems

Image quality issues with the Canon PowerShot SX30 IS can often be resolved by adjusting settings or addressing hardware factors. Ensure the lens is clean and free of smudges, as dirt can cause blurry images. Check the autofocus function and ensure it is set correctly for your subject. If images appear grainy, try increasing the lighting or using lower ISO settings. For soft focus, reset the camera to default settings or update the firmware. Consult the user manual for guidance on optimizing image settings and troubleshooting specific quality concerns.

The Canon PowerShot SX30 IS is a versatile and feature-rich camera, offering excellent zoom capabilities and image quality, making it a great choice for everyday photography needs.

11.1 Summary of Key Features and Benefits

The Canon PowerShot SX30 IS offers a 35x optical zoom, 14.1 MP CMOS sensor, and image stabilization, ensuring sharp and detailed photos. Its compact design and intuitive controls make it ideal for everyday use. The camera supports various shooting modes, including Auto, P, Av, Tv, and Manual, catering to both beginners and advanced users. With its robust feature set and portability, the SX30 IS is a versatile choice for capturing high-quality images in diverse settings, making it a reliable companion for photography enthusiasts.

11.2 Tips for Getting the Most Out of Your Camera

To maximize your Canon PowerShot SX30 IS experience, familiarize yourself with its manual and explore shooting modes like Auto, P, Av, Tv, and Manual. Experiment with the 35x optical zoom for distant subjects and use image stabilization for steady shots. Adjust settings like resolution and compression for optimal image quality. Practice video recording techniques and utilize scene modes for specific scenarios. Regularly clean the lens and update firmware for peak performance. Explore accessories like memory cards and tripods to enhance versatility and convenience.

11.3 Resources for Further Learning and Support

For comprehensive guidance, download the official Canon PowerShot SX30 IS PDF manual from Canon’s website or trusted sources like ManualsLib. This detailed guide covers operation, troubleshooting, and advanced features. Additionally, Canon’s support page offers drivers, software updates, and troubleshooting tips. Explore tutorials and reviews online for practical insights. Ensure Adobe Reader is installed to view the PDF manual effectively. Utilize these resources to master your camera and resolve any issues promptly.

westinghouse 2 outlet timer instructions

The Westinghouse 2 Outlet Timer is a versatile device designed to automate lamps or appliances. It features two polarized outlets, three operating modes, and a security mode for random lighting control, making it ideal for home automation and energy efficiency.

Overview of the Timer and Its Purpose

The Westinghouse 2 Outlet Timer is a user-friendly device designed to automate the operation of lamps, appliances, or other electrical devices. It allows users to set specific on/off times, enabling seamless control over their devices. The timer features two polarized outlets, providing the ability to manage two devices independently. Its primary purpose is to enhance convenience, save energy, and add a layer of security through random lighting control. With modes like continuous on, continuous off, and automatic timer, it offers flexibility for various needs. This device is ideal for homeowners seeking to automate their routines, reduce energy waste, and enjoy a smarter living experience.

Key Features of the Westinghouse 2 Outlet Timer

The Westinghouse 2 Outlet Timer boasts a range of features that make it a practical and efficient solution for home automation. It includes two polarized outlets, allowing users to control two devices independently. The timer offers three primary modes: Continuous On, Continuous Off, and Automatic Timer, providing flexibility for different needs. Additionally, it features a Security Mode that randomizes lighting control, enhancing home security. The device supports daily scheduling, enabling users to set specific on/off times for their appliances. With its user-friendly interface and robust functionality, this timer is designed to simplify daily routines, reduce energy consumption, and offer peace of mind through reliable automation.

Setting Up the Timer

Setting up the Westinghouse 2 Outlet Timer involves plugging it into a nearby outlet and setting the current time and day for accurate automation. It also includes selecting the appropriate mode for your needs, ensuring seamless automation of your devices.

Plugging in the Timer and Initial Setup

Start by locating a nearby electrical outlet and plug in the Westinghouse 2 Outlet Timer. Ensure the outlet is grounded for safety. Once plugged in, the timer will automatically power on. Set the current time and day by pressing and holding the TIME button, then adjusting the hours and minutes using the appropriate buttons. Next, select the desired mode using the WHITE ON/TIMER switch located on the side of the unit. This initial setup ensures the timer is ready to automate your devices effectively. Follow these steps carefully to avoid any issues during operation. Proper setup is essential for reliable performance and energy efficiency.

Setting the Current Time and Day

To set the current time and day on your Westinghouse 2 Outlet Timer, press and hold the TIME button until the display begins to flash. Use the HOUR and MINUTE buttons to adjust the time. Once the correct time is set, press the TIME button again to save. To set the day, press and hold the WEEK button, then use the HOUR button to cycle through the days of the week. Ensure the time and day are accurate for proper timer functionality. This step is crucial for scheduling your devices to turn on and off at the correct times. Double-check the settings before proceeding to programming.

Understanding the Timer Modes (Continuous On, Continuous Off, Automatic Timer)

The Westinghouse 2 Outlet Timer offers three primary modes: Continuous On, Continuous Off, and Automatic Timer. In Continuous On mode, the connected device remains powered on until manually turned off. Continuous Off mode keeps the device off until manually activated. The Automatic Timer mode allows you to set specific on and off times, enabling automated control of your devices. Additionally, the timer features a Security Mode for random lighting control, enhancing home security. Understanding these modes ensures you can customize the timer to meet your needs, whether for convenience, energy savings, or security purposes. Proper mode selection is essential for optimal performance and functionality.

Programming the Timer

Set specific on and off times for your devices using the timer’s digital interface. Utilize the Security Mode for random lighting control and program multiple devices with the dual outlets.

Setting the On and Off Times

To program the timer, press and hold the TIME button to set the current hour and minute. Use the WEEK button to select the day. Press the ON and OFF buttons to set your desired times. The timer allows you to schedule devices to turn on and off once daily. For random lighting control, enable the Security Mode, which alternates on and off times. Ensure the timer is in Automatic Mode to follow the programmed schedule. After setting, press the SAVE button to store your settings. This feature ensures your devices operate efficiently and securely, aligning with your daily routine or security needs.

Using the Security Mode for Random Lighting Control

The Security Mode on the Westinghouse 2 Outlet Timer offers random lighting control, enhancing home security when you’re away. To activate it, switch the timer to Security Mode using the designated button or setting. This mode alternates the on and off times slightly, creating a realistic pattern that mimics occupancy. It works with both outlets, providing a coordinated lighting effect. The random intervals make it difficult for potential intruders to detect a pattern, adding an extra layer of security. This feature is especially useful for vacation homes or extended absences, ensuring your space appears occupied and deterring unauthorized access.

Programming Multiple Devices with the Dual Outlets

The Westinghouse 2 Outlet Timer allows you to program two devices independently, offering flexibility for automating different appliances. Each outlet can be set with its own on/off schedule, enabling synchronized or separate control. For example, you can program one outlet for a lamp and the other for a TV, each following their own timer settings. This dual functionality is ideal for managing multiple devices efficiently. The timer also supports random start times in Security Mode, enhancing its versatility. By programming both outlets, you can create a coordinated automation system that saves energy and adds convenience to your daily routine.

Operating the Timer

The Westinghouse 2 Outlet Timer operates in Timer, On, or Off modes, allowing manual overrides and easy switching between settings for convenient device control.

Switching Between Modes (Timer, On, Off)

Switching between modes on the Westinghouse 2 Outlet Timer is straightforward. Use the WHITE ON/TIMER switch on the side to toggle between Timer, On, and Off modes. In Timer mode, the device follows your programmed schedule. The On mode keeps the connected devices constantly powered, while Off mode disables all functionality. This feature allows for quick manual overrides when needed, providing flexibility in controlling your appliances. The modes are designed to cater to different user preferences, ensuring seamless operation and energy management. This simplicity makes the timer user-friendly and adaptable to various household needs.

Manually Overriding the Timer Settings

To manually override the timer settings, locate the WHITE ON/TIMER switch on the side of the Westinghouse 2 Outlet Timer. Toggle this switch to select between On, Off, or Timer mode. In On mode, the connected devices will stay powered continuously until switched off. In Off mode, all power to the outlets is cut off. This feature is handy for temporary adjustments without altering the programmed schedule. Manual overrides do not affect the saved timer settings, allowing you to revert to automated control whenever needed. This flexibility ensures you can manage your devices according to changing requirements while maintaining energy efficiency and convenience.

Checking and Adjusting the Time

To ensure accurate operation, periodically check and adjust the timer’s current time and day settings. Press and hold the TIME button, then use the WEEK and HOUR buttons to set the correct day and hour. This ensures your programmed schedules remain synchronized. If the timer loses power, the time may reset, requiring manual adjustment. Regular checks help maintain precise automation and energy efficiency. Adjustments are quick and straightforward, keeping your devices operating according to your preferred schedule. This feature ensures reliability and convenience, making the Westinghouse 2 Outlet Timer a dependable choice for home automation needs.

Troubleshooting Common Issues

If the timer doesn’t turn on, check the power source and ensure it’s properly plugged in. For schedule issues, reset the timer and reprogram. Outlet problems may require checking connected devices or resetting the timer.

What to Do If the Timer Does Not Turn On

If the Westinghouse 2 Outlet Timer doesn’t turn on, first ensure it’s properly plugged into a working electrical outlet. Check the circuit breaker or fuse box to confirm the power supply is intact. Verify that the timer is set to the correct mode (Timer, On, or Off). If the issue persists, unplug the timer, wait 10 seconds, and plug it back in to reset it. Ensure the timer’s internal clock is set correctly, as incorrect time settings can affect functionality. If none of these steps resolve the issue, consult the user manual or contact customer support for further assistance.

Fixing Issues with the Timer Not Following the Set Schedule

If the timer isn’t following the set schedule, ensure the current time and day are correctly programmed. Press and hold the TIME button, then use the WEEK and HOUR/MINUTE buttons to adjust. Verify that the timer mode (Automatic Timer) is selected, as other modes like Continuous On or Off may override scheduling. Check that the device is plugged into a working outlet and the timer is properly powered. If issues persist, reset the timer by unplugging it for 10 seconds and replugging it. Review the programmed times to ensure they are set correctly. Consult the user manual for detailed instructions or contact customer support for further assistance if needed.

Resolving Problems with the Outlets

If the outlets are not functioning properly, first ensure that the timer is correctly plugged into a working electrical outlet. Verify that the device connected to the timer is turned on and functioning independently. Check for loose connections or damage to the timer’s outlets or the plugged-in device. If an outlet is not working, unplug the timer, wait 10 seconds, and plug it back in to reset it. Ensure the timer is in the correct mode (Timer, On, or Off) for the desired operation. If issues persist, consult the user manual or contact Westinghouse customer support for further assistance or potential replacement. Always follow safety precautions when handling electrical devices.

Safety and Maintenance

Always unplug the timer before cleaning or maintaining it. Avoid overloading outlets and keep the device away from water. Regularly clean dust and ensure cords are undamaged for optimal performance.

Important Safety Precautions

Always adhere to safety precautions when using the Westinghouse 2 Outlet Timer. Avoid exposing the device to water or moisture, as it can cause electrical hazards. Never overload the outlets, as this may lead to overheating or fire risks. Keep the timer away from children and flammable materials. Ensure the device is placed on a stable, dry surface. Regularly inspect the timer and cords for damage before use. Unplug the timer before cleaning or performing maintenance. Follow the manufacturer’s guidelines for maximum load capacity. Use the timer indoors only and avoid modifying the device, as this can void the warranty and pose safety risks. By following these precautions, you can ensure safe and reliable operation of your Westinghouse 2 Outlet Timer.

Cleaning and Maintaining the Timer

Regular cleaning and maintenance are essential to ensure the Westinghouse 2 Outlet Timer functions optimally. Use a soft, dry cloth to wipe down the timer and outlets, removing dust and debris that may accumulate. Avoid using liquids or harsh chemicals, as they can damage the electrical components. Inspect the timer and cords for signs of wear or damage; replace them immediately if any issues are found. For stubborn dirt, a slightly damp cloth can be used, but ensure the timer is unplugged first. After cleaning, allow it to dry completely before plugging it back in. Regular maintenance helps prevent malfunctions and extends the timer’s lifespan. Always refer to the user manual for specific care instructions.

Replacing or Resetting the Timer

If the Westinghouse 2 Outlet Timer becomes unresponsive or faulty, resetting or replacing it may be necessary. To reset, unplug the timer, wait 10 seconds, and plug it back in. This often resolves minor issues. If the timer still doesn’t function, check for physical damage or wear. If damaged, replace it with a new Westinghouse timer. When replacing, ensure the new timer is compatible with your devices and has the same or higher load capacity. Always follow the manufacturer’s instructions for disposal and installation. Resetting or replacing the timer ensures reliable operation and maintains your home automation setup. Regular checks can prevent unexpected failures and keep your devices running smoothly.

Additional Resources

Access user manuals, troubleshooting guides, and FAQs on the Westinghouse website. Watch tutorial videos for setup and usage tips. Visit their support page for detailed instructions and downloads.

Downloading the User Manual

To download the user manual for the Westinghouse 2 Outlet Timer, visit the official Westinghouse website or platforms like ManualsLib. Search for models like TM263 or H28426. Ensure you select the correct model to access accurate instructions. The manual provides detailed setup, programming, and troubleshooting guides. It also includes safety precautions and maintenance tips. For convenience, download the PDF version for offline access. If you can’t find the manual on Westinghouse’s site, check authorized retailers or support forums. Having the manual handy will help you maximize the timer’s features and resolve any issues quickly. Visit the Westinghouse support page for direct links.

Accessing Online Support and FAQs

For assistance with the Westinghouse 2 Outlet Timer, visit the official Westinghouse website. Navigate to the support section, where you’ll find dedicated resources for timer models like TM263 and H28426. The site offers FAQs, troubleshooting guides, and detailed instructions. You can also access customer support by submitting a query or calling the provided contact number. Additionally, Westinghouse offers downloadable manuals and tutorial videos to help you understand and use the timer effectively. Explore the FAQs to resolve common issues, such as programming errors or outlet malfunctions. The online support page is a comprehensive resource to ensure you get the most out of your timer. Visit the support page for more information.

Watching Tutorial Videos for Setup and Use

For a visual guide to setting up and using the Westinghouse 2 Outlet Timer, watch tutorial videos available on platforms like YouTube. These videos provide step-by-step instructions for programming, troubleshooting, and understanding timer modes. Many videos are specific to models like the TM263 or H28426, ensuring relevance to your device. They often cover topics like setting the current time, using security mode, and resolving common issues. Tutorial videos are an excellent resource for users who prefer visual learning or need clarification on specific features. Visit the Westinghouse Timer Tutorials to enhance your understanding and make the most of your timer’s functionality.

The Westinghouse 2 Outlet Timer offers a convenient and energy-efficient way to automate your home. With easy setup and versatile features, it enhances daily routines and provides reliable control over your devices.

Final Tips for Effective Use

Regularly check the timer’s current time and outlet connections to ensure smooth operation. Use the security mode to create a random on/off schedule for added home security. Schedule devices during off-peak hours to save energy. Update the timer after power outages to maintain accuracy. Clean the timer periodically to prevent dust buildup. Refer to the manual for troubleshooting common issues. Experiment with different modes to find the setup that best fits your needs. By following these tips, you can maximize the functionality and efficiency of your Westinghouse 2 Outlet Timer, ensuring it serves you well for years to come.

Benefits of Using the Westinghouse 2 Outlet Timer

The Westinghouse 2 Outlet Timer offers numerous benefits, including energy efficiency and convenience. It allows you to automate lamps or appliances, reducing manual effort and saving time. The security mode provides random lighting control, enhancing home safety when you’re away. Dual outlets enable programming for multiple devices, making it ideal for managing different tasks. Easy programming and reliable performance ensure consistent operation. This timer is perfect for home automation, energy savings, and adding a layer of security to your home. By automating your devices, you can enjoy a smarter, more efficient lifestyle with minimal effort.

book of judas pdf

The Gospel of Judas‚ a Gnostic text‚ offers a unique perspective on Judas Iscariot‚ portraying him as Jesus’ favored disciple who fulfilled a divine plan․ Discovered in Egypt and dated to the 2nd century‚ it challenges traditional Christian views‚ presenting Judas as a hero rather than a traitor․ This controversial text is now widely available as a PDF‚ sparking debates about its origins and theological implications․

1․1 Overview of the Gospel of Judas

The Gospel of Judas is a Gnostic text that reimagines the role of Judas Iscariot‚ presenting him as Jesus’ closest and most enlightened disciple․ Unlike the canonical gospels‚ it portrays Judas as the only one who truly understood Jesus’ teachings‚ entrusted with secret knowledge․ The text describes Judas as fulfilling a divine mission by betraying Jesus‚ enabling the crucifixion and spiritual liberation․ It critiques mainstream Christianity‚ labeling it a false church built by ignorant disciples․ The narrative emphasizes Gnostic themes of hidden truths and spiritual enlightenment‚ challenging traditional views of Judas as a traitor․ This text‚ part of the Nag Hammadi library‚ offers a radical alternative to the New Testament account‚ sparking theological debates and discussions about its origins and significance․

1․2 Historical Significance of the Text

The Gospel of Judas holds profound historical significance as a rare Gnostic manuscript challenging mainstream Christian narratives․ Discovered in Egypt in the late 20th century‚ it offers insights into early Christian diversity and theological debates․ The text‚ dated to the 2nd century‚ reflects Gnostic beliefs‚ emphasizing secret knowledge and spiritual enlightenment․ Its portrayal of Judas as a hero rather than a traitor contradicts traditional accounts‚ sparking debates about early Christianity’s complexity․ The manuscript’s survival and translation have allowed scholars to explore alternative perspectives on Jesus’ teachings and the role of his disciples․ This text remains a crucial artifact for understanding the evolution of Christian thought and the diversity of religious ideas in antiquity․

Discovery and Restoration of the Gospel of Judas

The Gospel of Judas was discovered in Egypt in the late 1970s‚ hidden in a codex․ After years in a Swiss bank vault‚ it underwent restoration and was published by National Geographic in 2006‚ revealing its unique Gnostic perspective․

2․1 The Discovery in Egypt

The Gospel of Judas was discovered in the late 1970s in a cave near El Minya‚ Egypt․ A Coptic manuscript‚ it was part of a codex containing four texts․ Initially‚ its significance was unrecognized‚ leading to its storage in a Swiss bank vault․ The manuscript’s deteriorated condition made restoration challenging․ Its rediscovery in the 21st century sparked scholarly interest‚ revealing a unique Gnostic narrative that reimagines Judas’ role in Christian history․ This find provided invaluable insights into early Christian diversity and Gnostic thought‚ making it a landmark discovery in religious textual history․

2․2 The Restoration Process

The restoration of the Gospel of Judas was a meticulous and complex process․ After its discovery‚ the manuscript suffered significant damage‚ with pages fragmented and deteriorated․ A team of experts‚ including conservators and scholars‚ worked to stabilize and reconstruct the text․ Advanced imaging techniques were employed to decipher faded or damaged sections․ The process was painstaking‚ requiring years of careful analysis and digital reconstruction․ Despite challenges‚ the restoration revealed a coherent narrative‚ shedding light on Gnostic theology․ The restored text‚ now available as a PDF‚ has become a vital resource for scholars and enthusiasts‚ offering insights into early Christian diversity and the unique perspective of the Gospel of Judas․

Historical Context of the Gospel of Judas

The Gospel of Judas‚ a 2nd-century Gnostic text‚ reflects theological debates in early Christianity․ It emerged during a time of diverse interpretations of Jesus’ teachings‚ challenging mainstream views and emphasizing secret knowledge․ The text was likely written by Sethian Gnostics‚ who sought to distinguish their beliefs from orthodox Christianity․ Its discovery and restoration have provided insights into the theological tensions of the era‚ offering a unique perspective on Judas’ role and the broader religious landscape of the time․

3․1 The Gnostic Movement

Gnosticism was a religious and philosophical movement emphasizing secret knowledge (gnosis) as the path to salvation․ Gnostics believed that the material world was flawed‚ created by a lesser deity‚ and that only through spiritual insight could one attain true understanding․ The Gospel of Judas reflects Gnostic ideals‚ portraying Judas as the sole disciple who grasped Jesus’ esoteric teachings․ Gnostics saw mainstream Christianity as misguided‚ rejecting its focus on ritual and hierarchical authority․ Instead‚ they valued direct spiritual experience and the revelation of hidden truths․ This text critiques orthodox Christianity‚ positioning Judas as a hero who facilitated Jesus’ liberation from the physical world․ Gnosticism’s emphasis on individual enlightenment resonated with those seeking deeper spiritual meaning beyond traditional doctrines․

3․2 Early Christian Reactions to the Text

Early Christian leaders vehemently rejected the Gospel of Judas‚ labeling it heretical․ Church fathers like Irenaeus condemned it as a Gnostic fabrication‚ dismissing its portrayal of Judas as a hero․ The text’s depiction of Judas as Jesus’ favored disciple contradicted mainstream Christian narratives‚ leading to its exclusion from the canonical Bible․ The early church viewed Gnosticism as a threat‚ opposing its emphasis on secret knowledge and rejection of material reality․ This text‚ seen as a challenge to apostolic authority‚ was actively suppressed‚ ensuring its marginalization․ Its rediscovery has reignited debates about early Christian diversity and the complexities of theological exclusion․ The Gospel of Judas remains a controversial artifact of Christian history․

Content and Structure of the Gospel of Judas

The Gospel of Judas is a dialogue-driven text‚ focusing on conversations between Jesus and Judas․ It reveals secret truths about the universe and humanity‚ emphasizing Gnostic themes․ The narrative portrays Judas as the only disciple who fully understands Jesus’ teachings‚ while others remain ignorant․ The text critiques mainstream Christianity‚ challenging its doctrines and authority․ Its structure blends esoteric revelations with polemical critiques‚ reflecting Gnostic literary styles; This unique composition sets it apart from canonical gospels‚ offering a radical reinterpretation of Judas’ role in Christian history․

4․1 Narrative and Key Themes

The Gospel of Judas presents a radical narrative where Judas Iscariot is portrayed as Jesus’ most trusted disciple‚ entrusted with secret revelations․ The text describes Judas as the only one who truly understood Jesus’ teachings‚ while the other disciples remained ignorant․ It reveals a Gnostic worldview‚ emphasizing the existence of a true‚ spiritual realm and a false‚ material one․ Jesus entrusts Judas with the task of initiating his crucifixion‚ framing it as a necessary act to free his spirit from the physical body․ The narrative critiques mainstream Christianity‚ challenging the authority of the apostles and the church they established; Key themes include the duality of truth and illusion‚ the role of Judas as a divine instrument‚ and the condemnation of false religious practices․ The text’s dialogue-driven structure and esoteric content reflect its Gnostic origins‚ offering a provocative alternative to traditional Christian narratives․

4․2 Structure and Literary Style

The Gospel of Judas is structured as a revelation dialogue‚ featuring direct conversations between Jesus and Judas․ The text employs a Gnostic literary style‚ emphasizing esoteric knowledge and spiritual truths․ It begins with a secret account of Jesus’ teachings to Judas‚ highlighting his unique role․ The narrative is fragmented‚ with gaps in the text due to its age and restoration process․ The language is mystical‚ focusing on the duality of the material and spiritual worlds․ The text critiques mainstream Christianity‚ portraying the other disciples as ignorant and their churches as false․ The literary style reflects Gnostic influences‚ with a focus on dialogue and revelation‚ making it distinct from canonical gospels․ The PDF versions include annotations and commentaries‚ aiding readers in understanding its complex structure and themes․

Theological Implications of the Gospel of Judas

The Gospel of Judas challenges traditional Christian theology by portraying Judas as a hero and questioning the nature of salvation and divine authority‚ reflecting Gnostic beliefs․

5․1 Gnosticism vs․ Mainstream Christianity

The Gospel of Judas reflects a stark contrast between Gnostic and mainstream Christian beliefs․ Gnosticism emphasizes secret knowledge (gnosis) as the path to salvation‚ while mainstream Christianity focuses on faith in Jesus’ resurrection and the authority of his apostles․ In the Gospel‚ Judas is portrayed as the only disciple who truly understood Jesus’ teachings‚ acting as his collaborator in fulfilling a divine plan․ This challenges the traditional view of Judas as a traitor and questions the legitimacy of the apostolic tradition․ The text also critiques the materialistic and hierarchical nature of mainstream Christianity‚ promoting instead a spiritual‚ esoteric understanding of the divine․ This theological divide highlights fundamental differences in how salvation and authority were viewed in early Christian communities․

5․2 The Role of Judas in Gnostic Theology

In Gnostic theology‚ Judas Iscariot is portrayed as a spiritual hero and the only disciple who fully comprehended Jesus’ esoteric teachings․ He is depicted as the recipient of secret knowledge‚ entrusted with the divine mission to facilitate Jesus’ crucifixion‚ thereby enabling his spiritual liberation from the material world․ This role elevates Judas above the other disciples‚ who are seen as ignorant of Jesus’ true message․ The text suggests that Judas’ actions were not those of a traitor but of a collaborator in a preordained plan․ His betrayal‚ in this context‚ is an act of obedience to Jesus’ will‚ earning him a place of honor in the Gnostic vision of the afterlife‚ where he sits at Jesus’ right hand․ This portrayal starkly contrasts with mainstream Christian narratives‚ where Judas is vilified as the ultimate betrayer․

Reception and Interpretation of the Gospel of Judas

The Gospel of Judas has sparked intense debate‚ with scholars interpreting it as a Gnostic critique of mainstream Christianity‚ challenging traditional views of Judas’ role in Jesus’ story․

6․1 Scholarly Interpretations

Scholars widely view the Gospel of Judas as a Gnostic text critiquing mainstream Christianity․ April DeConick interprets it as a Sethian polemic‚ challenging the legitimacy of apostolic succession and portraying Judas as the only disciple who truly understood Jesus’ esoteric teachings․ This perspective flips the traditional narrative‚ framing Judas not as a traitor but as a hero fulfilling a divine plan․ The text’s structure and dialogue genre suggest it was written to critique the emerging orthodox church’s reliance on Peter and other apostles․ Its discovery has sparked debates about early Christian diversity and the role of Gnosticism in shaping alternative theological narratives․

6․2 Public and Cultural Reactions

The Gospel of Judas has sparked significant public and cultural interest‚ challenging traditional views of Judas Iscariot․ Its portrayal of Judas as a hero rather than a traitor has fueled debates about Christianity’s origins․ The 2006 publication by National Geographic ignited widespread media attention‚ with many questioning the text’s authenticity and implications․ Public reactions range from fascination with its alternative narrative to skepticism about its historical credibility․ The text’s availability as a PDF has made it accessible to a broad audience‚ encouraging further exploration and discussion․ This has led to a reevaluation of Judas’ role in Christian history‚ contrasting sharply with the New Testament’s depiction‚ and highlighting the diversity of early Christian thought․

Availability of the Book of Judas PDF

The Gospel of Judas PDF is widely available online‚ with sources like National Geographic and the Nag Hammadi Library offering free downloads․ Translations and scholarly commentaries accompany the text‚ making it accessible for both researchers and the general public to explore its controversial narrative and theological insights․

7․1 Sources for Downloading the PDF

The Gospel of Judas PDF is accessible through various reputable sources․ National Geographic‚ which played a key role in its publication‚ offers a free download on their website․ Additionally‚ academic platforms like the Nag Hammadi Library and scholarly databases provide the text in multiple languages․ Many religious and historical websites also host the PDF‚ often accompanied by translations and commentaries․ These sources ensure that the text is widely available for both researchers and the general public‚ facilitating a deeper understanding of its controversial narrative and theological significance․

7․2 Translations and Commentaries

The Gospel of Judas is available in various translations‚ including English‚ Spanish‚ and German‚ ensuring accessibility to a global audience․ Scholars like Rodolphe Kasser and Marvin Meyer have provided detailed commentaries‚ offering insights into its Gnostic themes and historical context․ These translations and analyses help readers understand the text’s complex theology and its critique of mainstream Christianity․ Commentaries often highlight the text’s structure‚ dialogue format‚ and its portrayal of Judas as a spiritual hero․ Such resources are invaluable for both academic study and personal exploration‚ making the Gospel of Judas a rich subject for theological and historical examination․

The Gospel of Judas PDF offers a provocative‚ alternative narrative of Judas Iscariot‚ challenging traditional views and sparking theological debates․ Its discovery and translation remain historically significant․

8․1 Summary of Key Points

The Gospel of Judas PDF reveals a Gnostic perspective‚ portraying Judas as Jesus’ favored disciple who fulfilled a divine plan․ Discovered in Egypt‚ this 2nd-century text challenges mainstream Christianity by depicting Judas as a hero‚ not a traitor․ It emphasizes secret teachings and critiques the apostles‚ offering a unique theological lens․ The text’s restoration and publication have sparked debates about its authenticity and significance․ Despite its controversial nature‚ the Gospel of Judas provides valuable insights into early Christian diversity and Gnostic thought․ Its availability as a PDF has made it accessible for scholarly and public exploration‚ fostering ongoing discussions about its role in religious history․

8․2 Final Thoughts on the Significance of the Gospel of Judas

The Gospel of Judas PDF remains a pivotal text in understanding early Christian diversity and Gnostic thought․ Its portrayal of Judas as a hero challenges traditional narratives‚ offering a fresh perspective on Jesus’ teachings and the role of disciples․ While its authenticity as an eyewitness account is disputed‚ it provides invaluable insights into theological debates of the 2nd century․ The text’s survival and restoration underscore the complexity of religious history‚ inviting readers to explore beyond mainstream Christian traditions․ Ultimately‚ the Gospel of Judas PDF serves as a reminder of the multifaceted nature of early Christianity‚ encouraging deeper reflection on faith‚ history‚ and interpretation․